

Rubber Stamping Bunting Flags and Bonus Project
Posted by Susan J. Deep Red Stamps on Sep 30th 2021
Making your own swag to hang on the wall or bulletin board is a super fun project. Whether it's for holiday decor, a party or a classroom, creating bunting flags will 'wow' everyone.
Here's some fun ideas:
1) Use holiday themed stamps for Valentine's Day, Halloween and Christmas. See our Holiday themed stamps here.
2) Use animals for home decor or for the classroom. See our Animals Stamps here.
3) Bonus: you can use the triangle shape to create little trays to hold seed beads.
This is a dual-use template for creating 2 different project.....how great! Seed Bead Tray Project, see bottom of this post.
We've created a free bunting flag template for you to print out and make your own. Below are some tips and tricks to make the creating process goes smoothly.
Materials needed:
Paper - card stock, smooth, any thickness. Vary your colors or use just one color.
String - about 24 inches. Cut 3 sections; (depends on how many swags you want to make). You can make them as long as you wish. This size was easy to handle and fit my bulletin board.
Rubber stamps - at least 3 different ones.
Stamping Ink - any that stamps nicely onto your smooth cardstock.
Bunting flag template - free 3 inch and 4 inch sizes. Click on the link to download:
https://www.jpsdigital.com/deepredstamps/downloads...
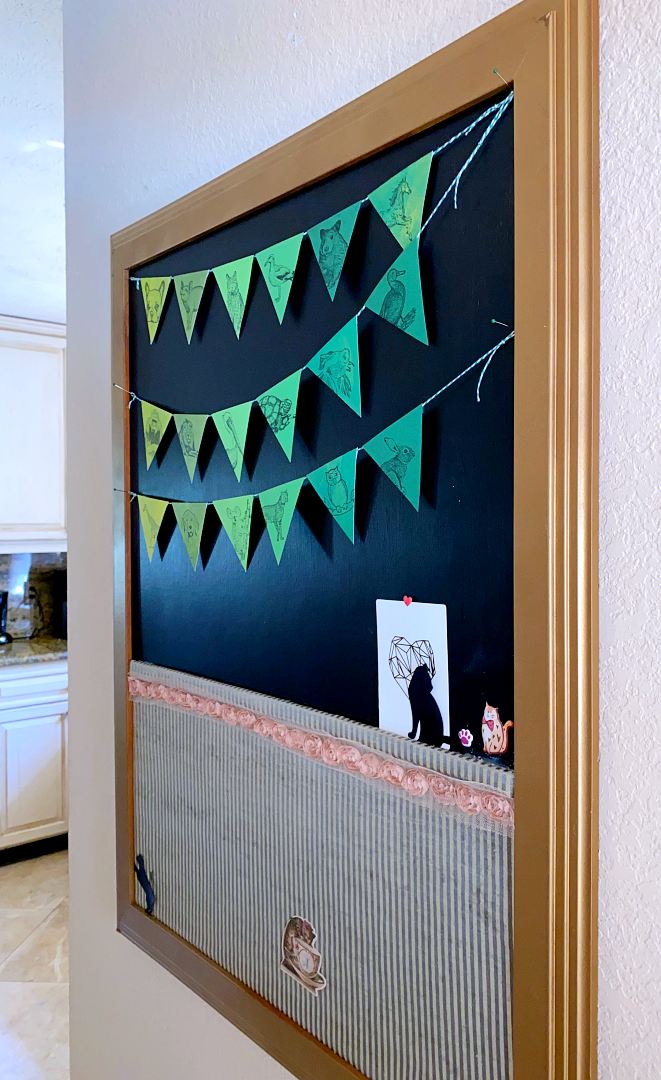
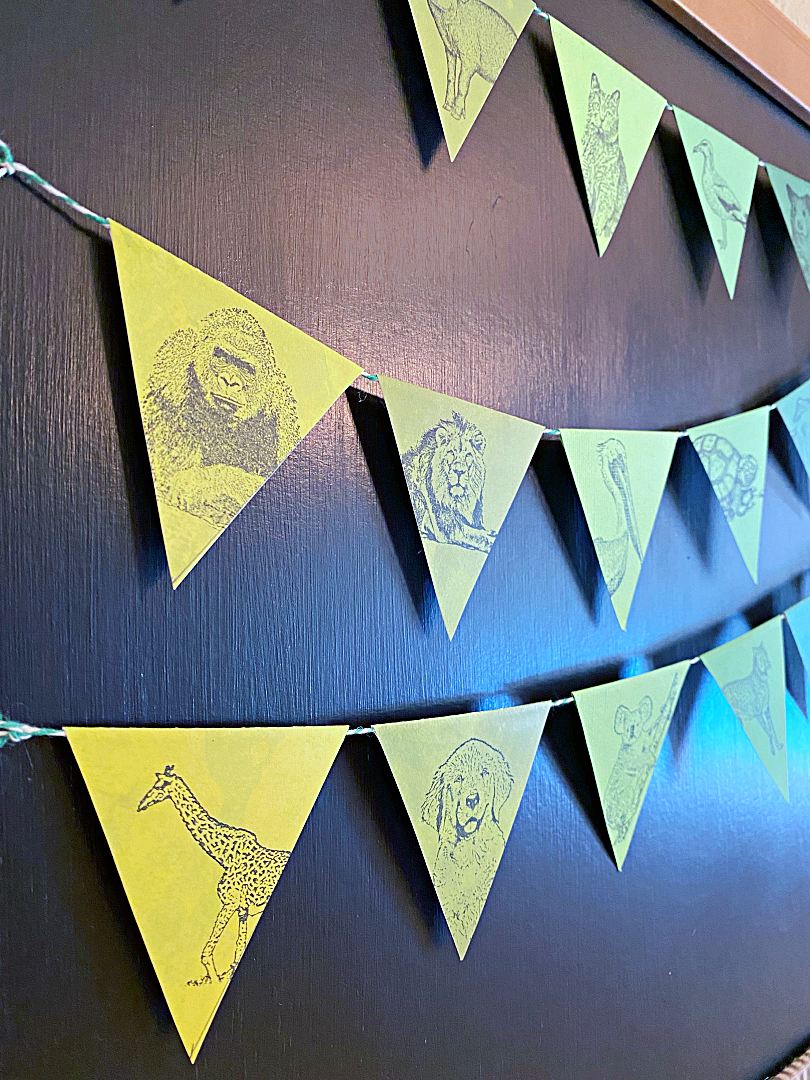
Above, chalkboard bulletin board in kitchen approximately 22 inches wide featuring 18 unique animal rubber stamps on 3 inch bunting flags. Several shades of smooth, green card stock were chosen for an ombre look.
Print and cut out your template. Chose your paper pieces and cut out your triangles (flags). Tip: Stack several pieces of paper together and cut out the triangles.
Once you have the triangles cut, stack them together and trim the corners off the scoring side. This will be what folds over your string.
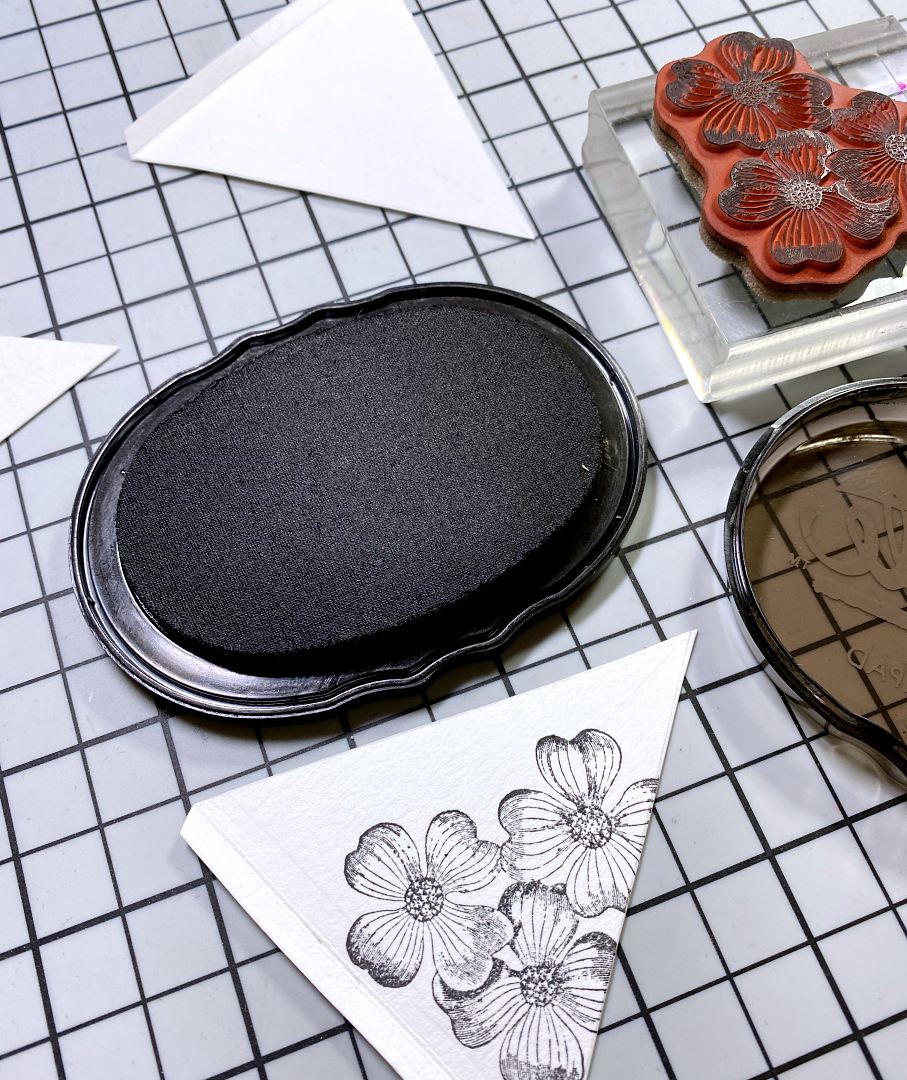
The super fun part.....stamp each of the flags with whatever color and stamp design you like! Also, what's fun is that you are stamping a portion of the stamp design so make sure the face or portion of the design is lined up onto the flag.
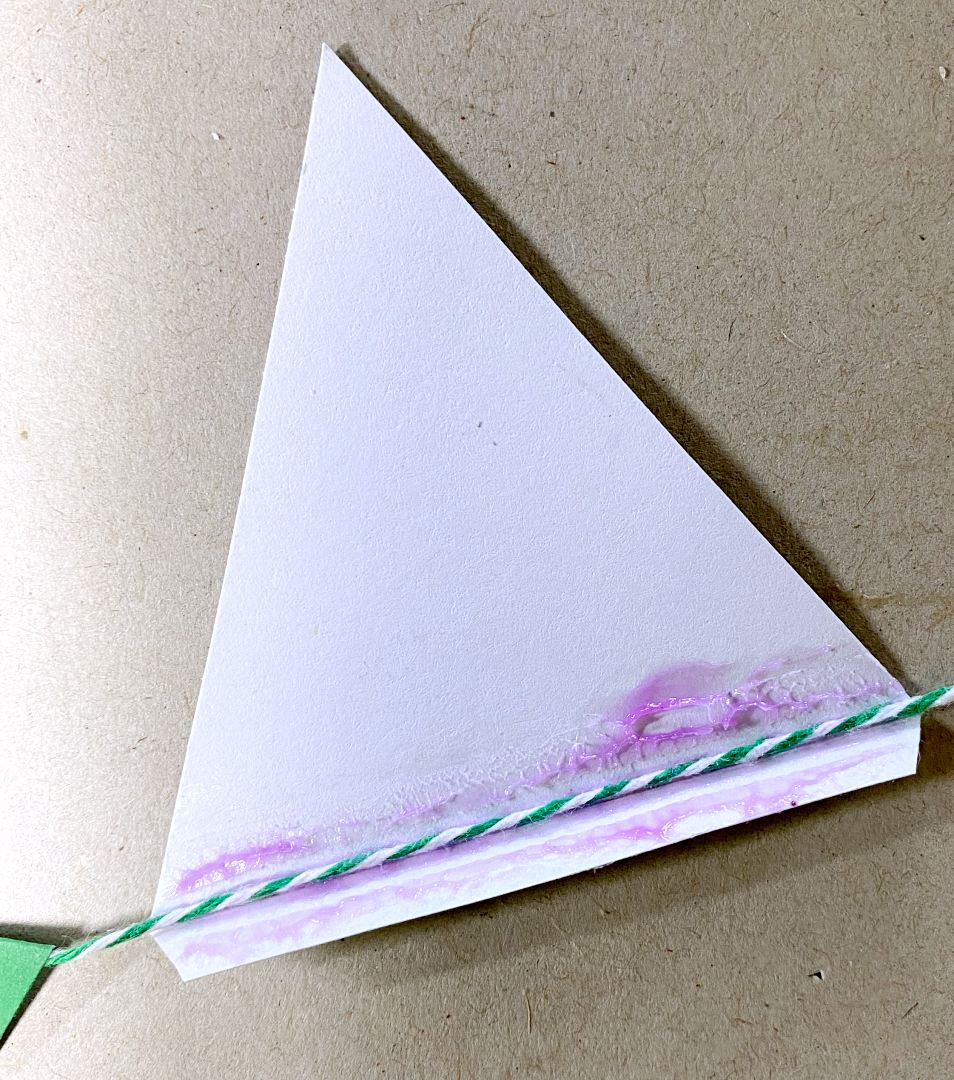
Score the one edge using the back of an Xacto knife or closed pair of scissors.
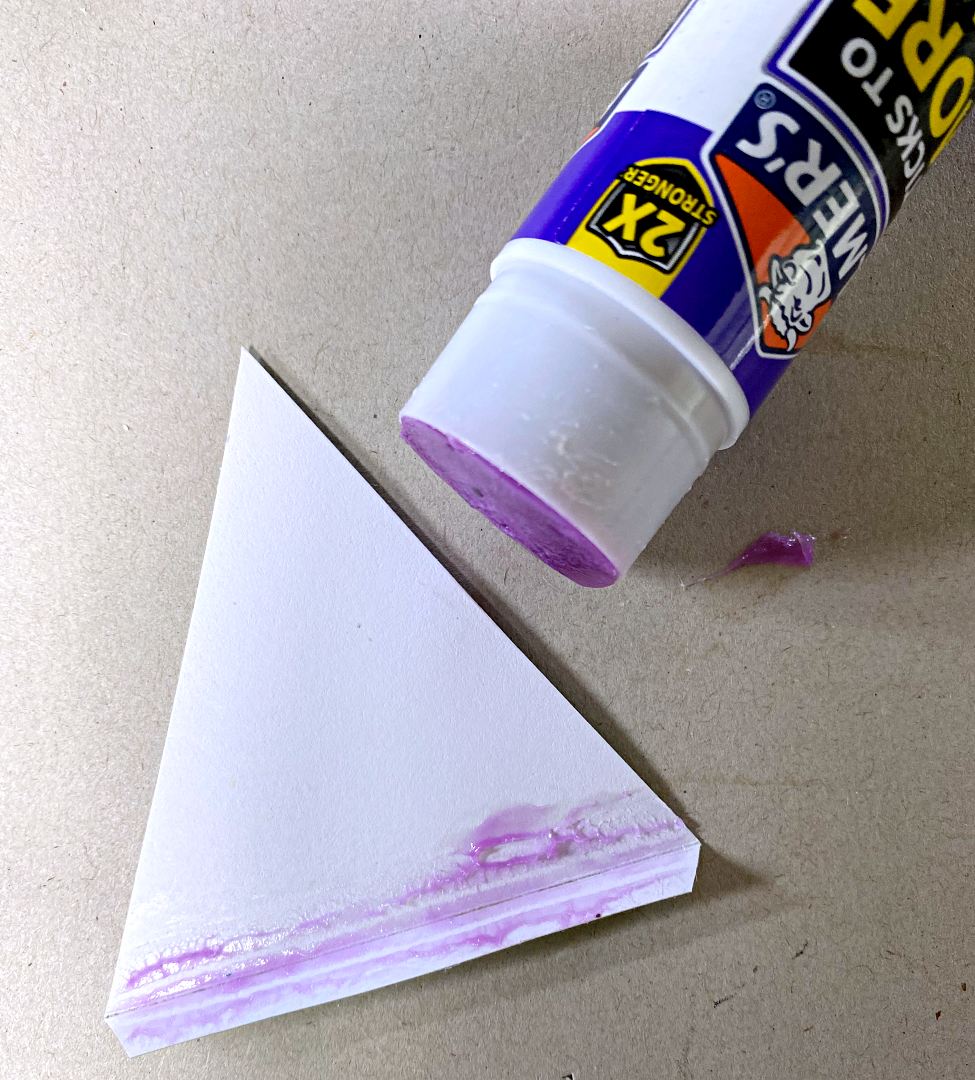
Add glue along the scored edge.
You can use either type of glue: Elmer's Xtreme white glue (liquid) OR Elmers 2X Stronger (glue stick). Either one will work great and they dry fast.
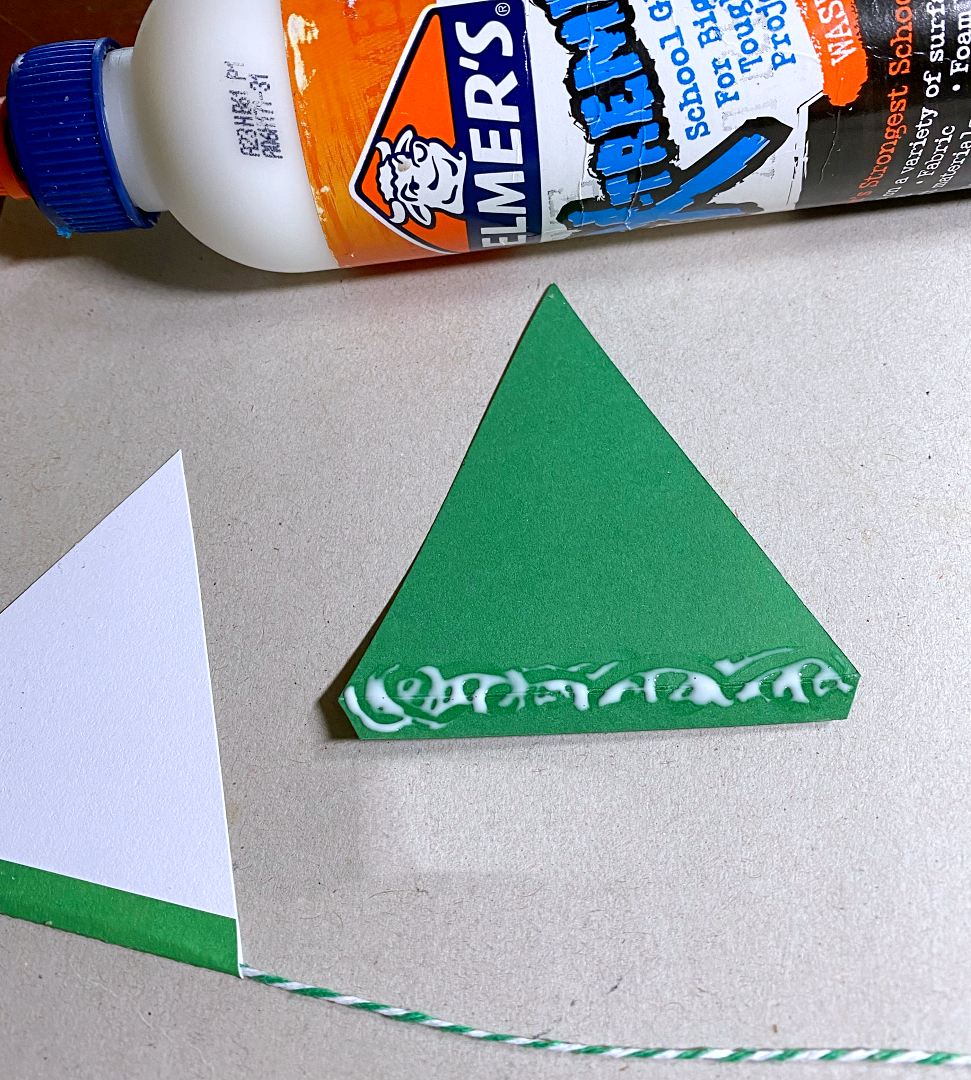
Place the string in the glue area of each flag and fold over.
For extra security, I added pins while I was working along the row. By the time I was 2 flags over, I would remove the pin and the paper would be securely glued onto the string.
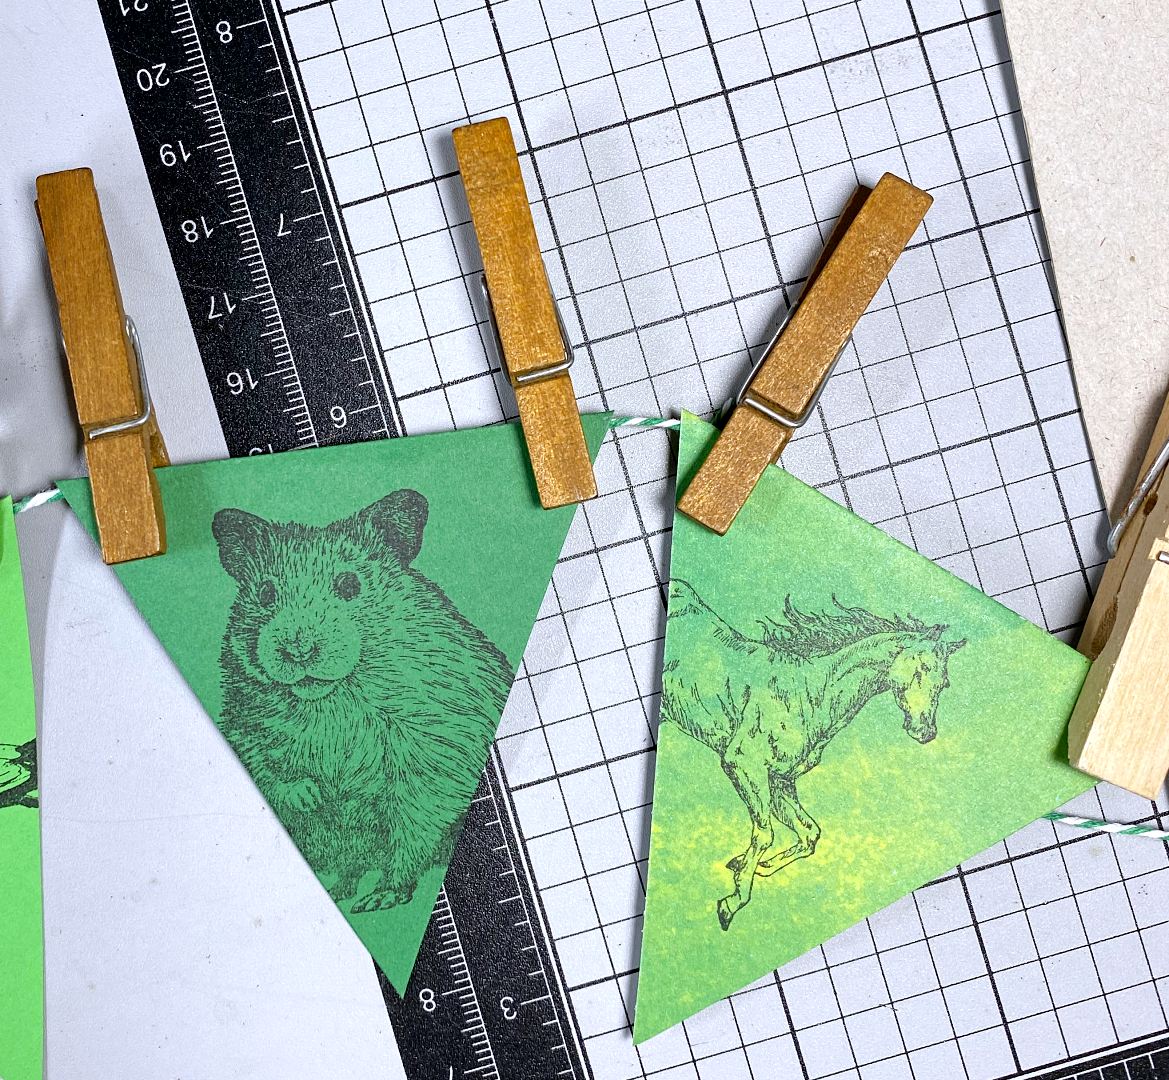
Above, closeup of our Hamster Rubber Stamp and Spirited Horse Rubber Stamp.
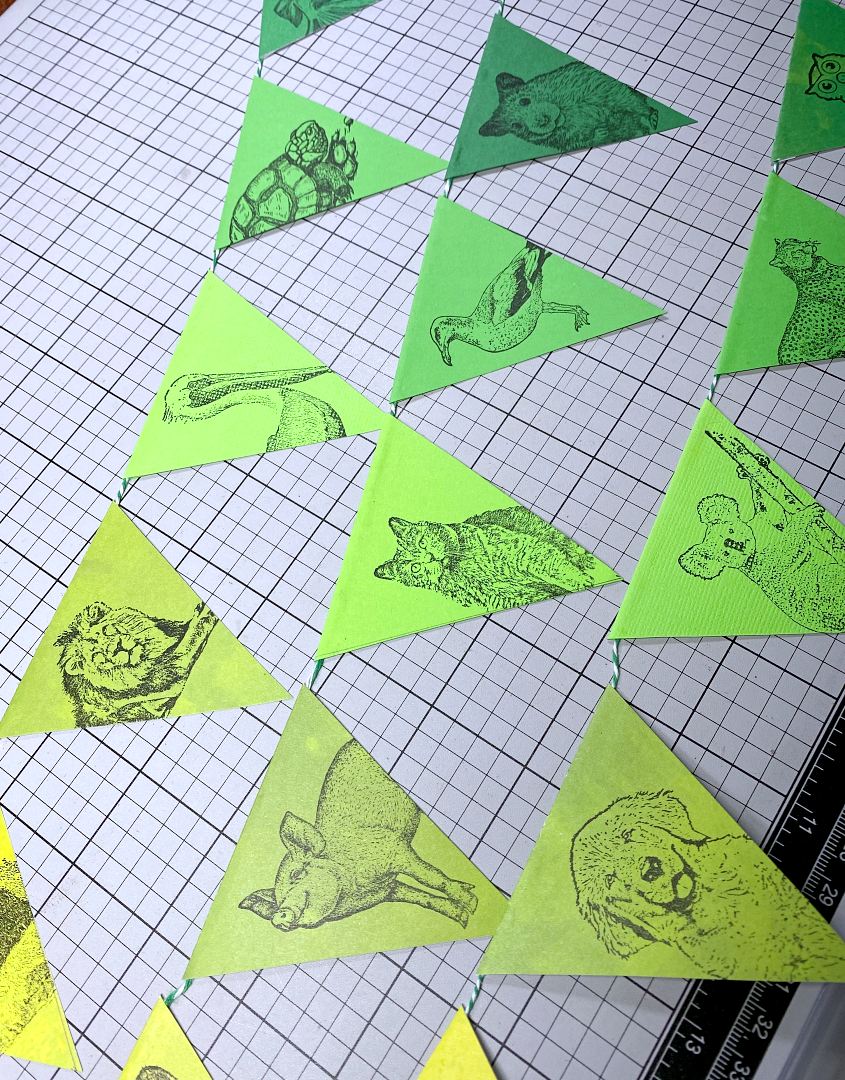
I selected card stock colors in shades of green for my project.
Make sure you leave a little space in between flags. You can add tassles, ribbons or buttons if you like.
I am so looking forward to creating a Halloween theme bunting swag in orange ombre flags and a Christmas one in red and green. Another great way to use your rubber stamps for a project that will impress everyone!
#Bonus Project - Seed Bead Trays......
If you take the triangles and score all 3 sides, you can create trays to hold beads when creating jewelry projects. Using Mod Podge to seal the surface and corners. These can be made out of a thicker card stock paper. Here's how it's done.....
Cut out your triangles using the 3 inch or 4 inch template.
Stamp your designs onto the triangles.
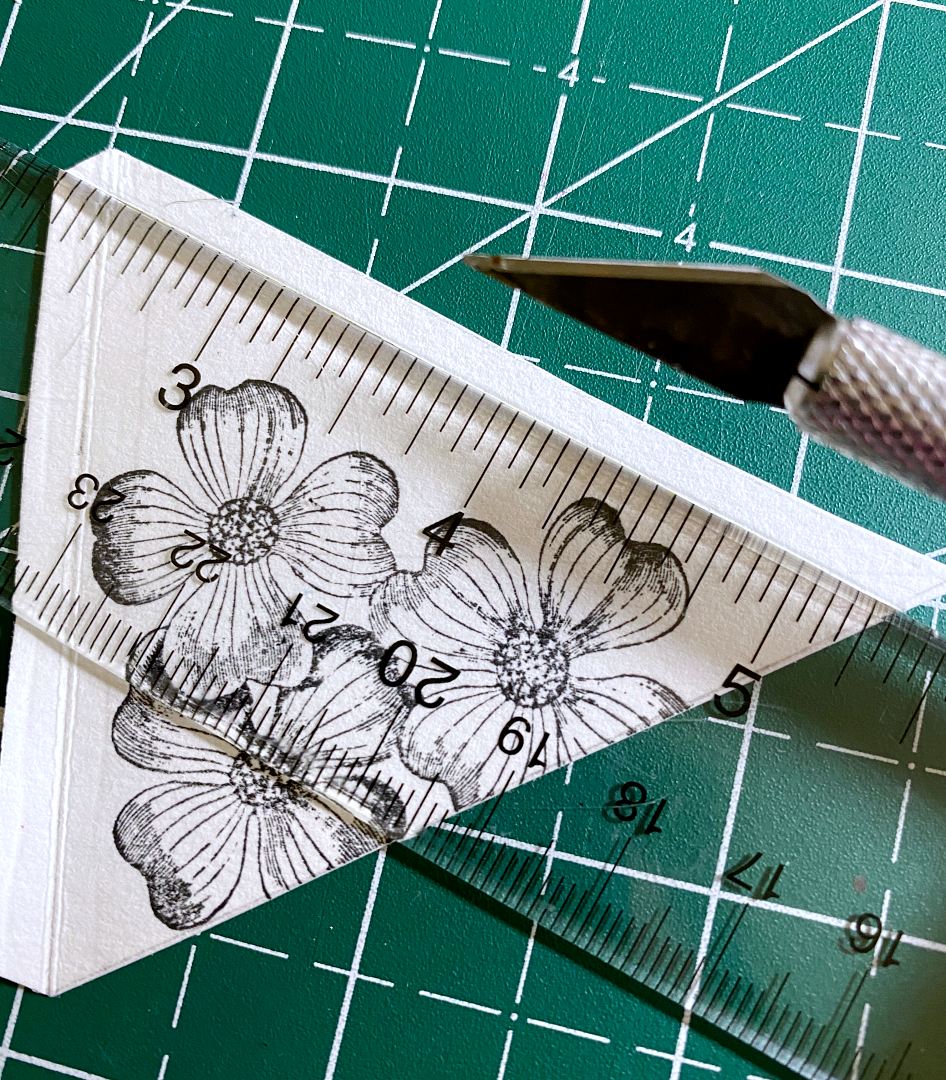
Score all 3 sides using the back of an Xacto knife or closed scissors and ruler as a guide. The stamped side of the triangle is the base. Fold all 3 sides to make it a tray.
Snip each of the meeting points; there are (3) total.
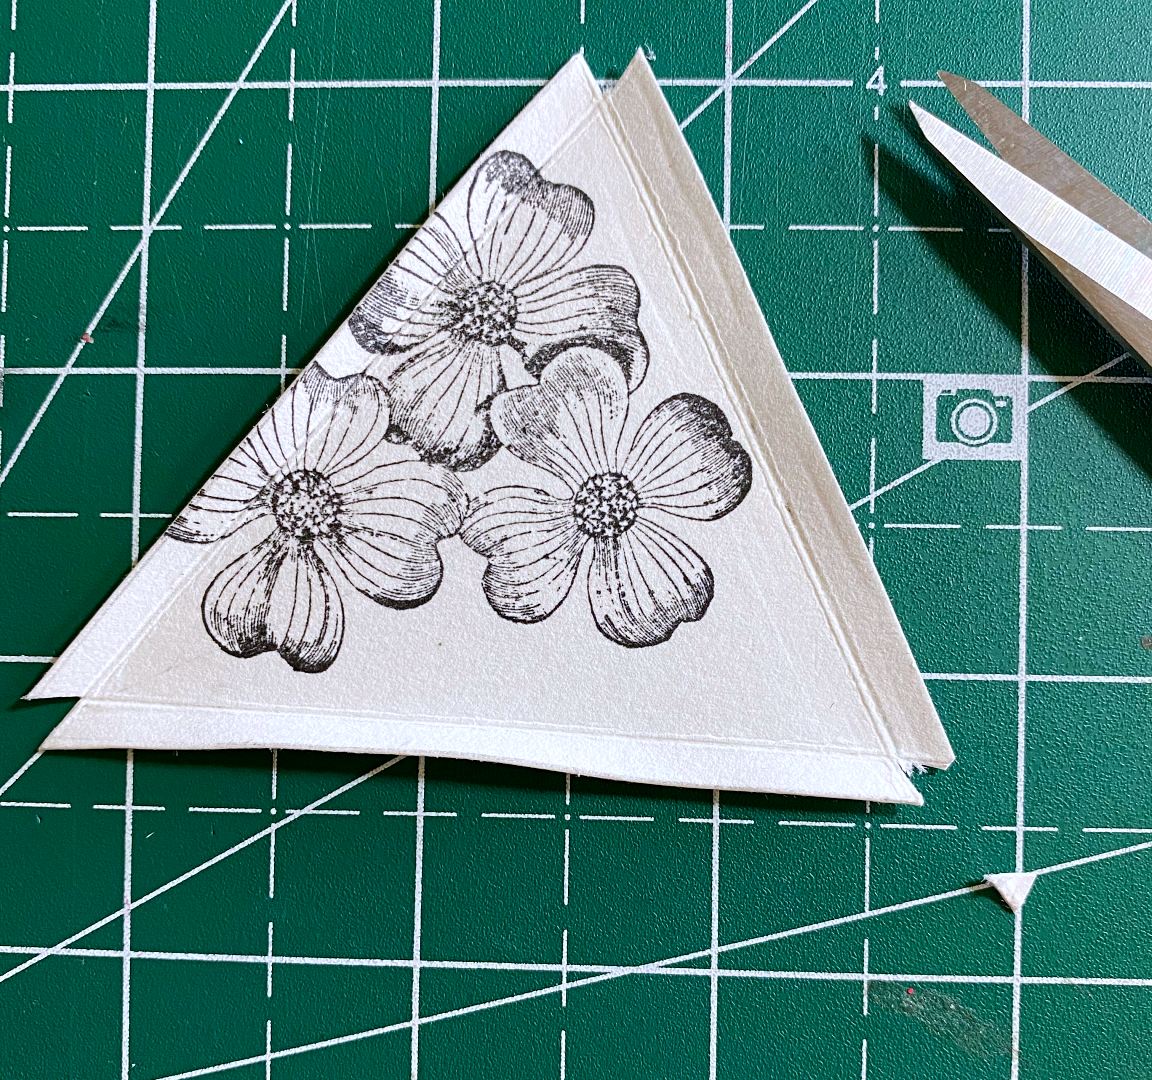
Fold your 3 score lines and have your corners meet.

Add Mod Podge (water based) to the surface to seal your stamped design. Important: Mod Podge is also a glue, so make sure to get it into the sides and corners. Once dry, your trays will be permanent and feel waterproof.
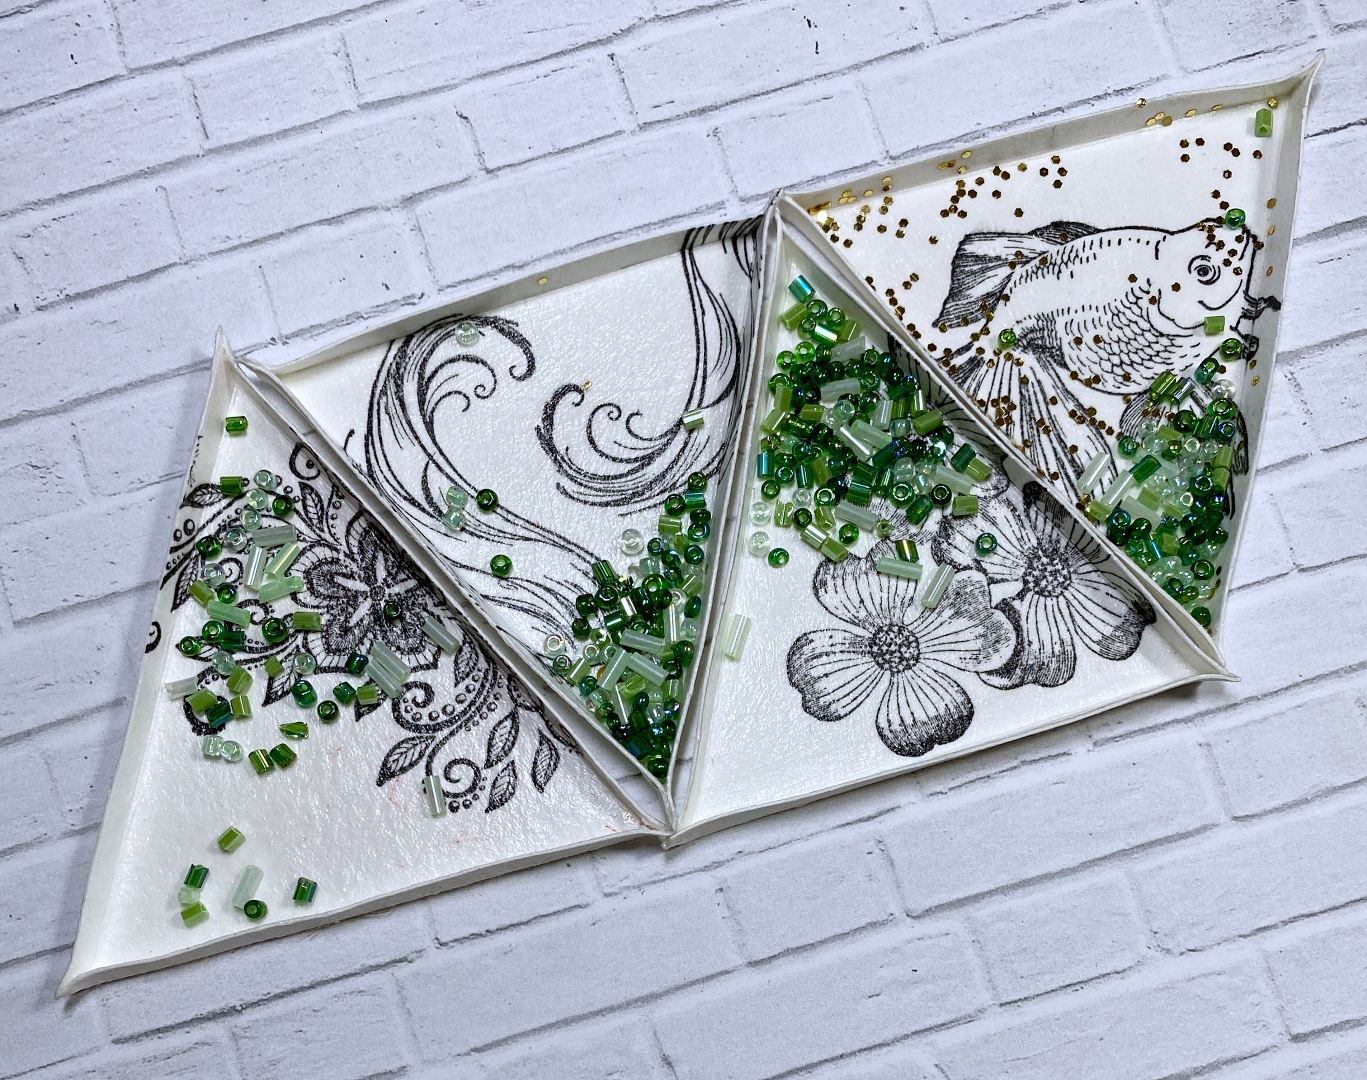
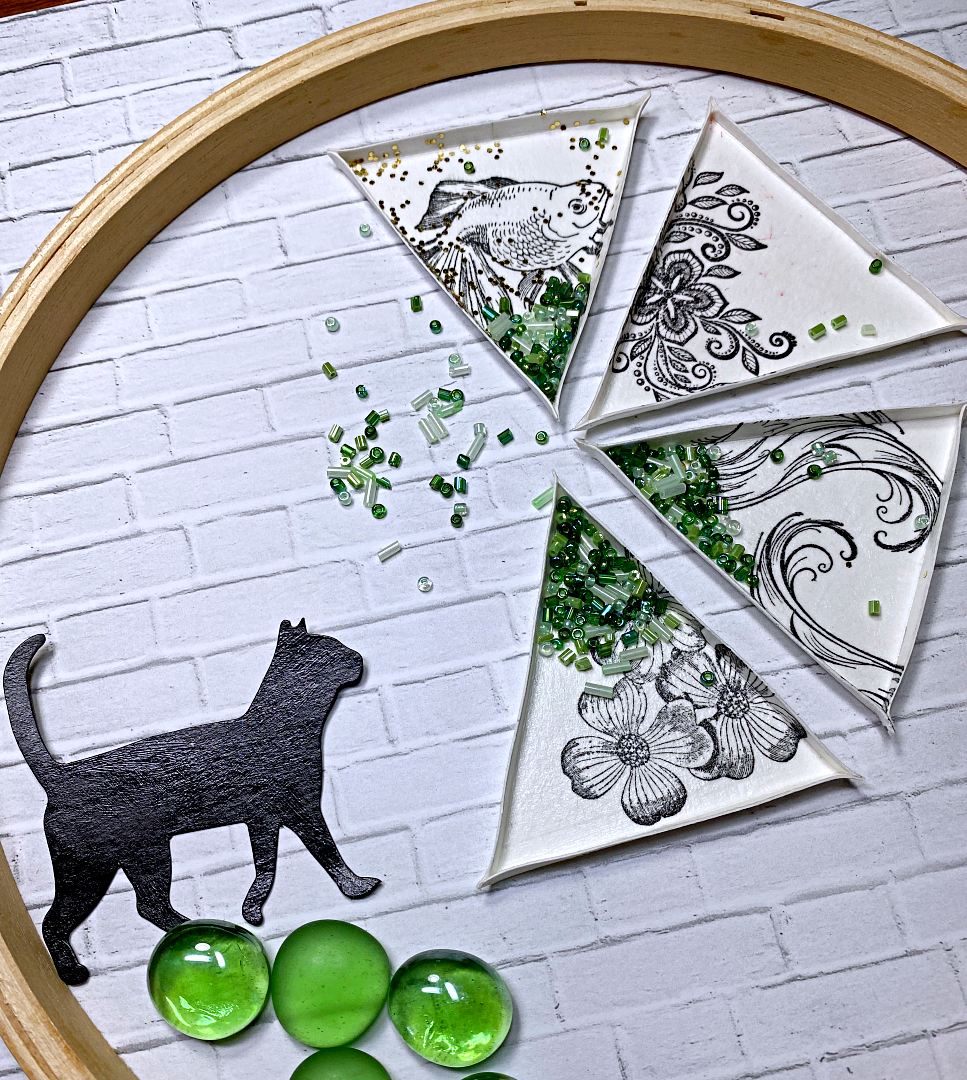
Above (from left to right), is our Lace Flower Corner Rubber Stamp, Angel Wings Rubber Stamp, Dogwood Flowers Rubber Stamp and Goldfish Rubber Stamp as seed bead trays.
If you personally do not work with beads, create these for a friend who makes jewelry, or make them to sell! A pack of 5 or 10? When properly sealed, these trays will work wonderfully and are more environmental than plastic :-) Having pretty designs on them using our rubber stamps, makes them super unique and beautifully functional. Another fun tip: Add glitter to the surface tray while the Mod Podge dries, (see Goldfish tray above features gold glitter which becomes permanent when dry).
Happy stamping and creating for the upcoming holiday season everyone!