Story Scrapbook Page
Posted by Susan J. Deep Red Stamps on Apr 22nd 2021
Whether you have photos from places you've travelled or have pictures of places you'd like to someday visit, making a scrapbook page is a great way to create your story. In this paper project, we combine pictures, artwork prints, stamps and paper scraps to create an Italian inspired 12x12 page.
We create each card individually so you can complete this project in a short time or over several days. Each card is essentially a journal card. To put them altogether, you can use clear, pre-configured scrapbook pages or 12x12 card stock. The page protectors come with pockets already to slide your photo or card in. To search for these, use the term 'Scrapbook Page Protectors' and many companies make them as full 12x12 or ones that feature pockets like what we used here.
Or, if you don't want to use page protectors, you can just use 12x12 card stock and tape the cards on. (I'll show how to add tape to the back and fold lines if you opt to create a foldable one).
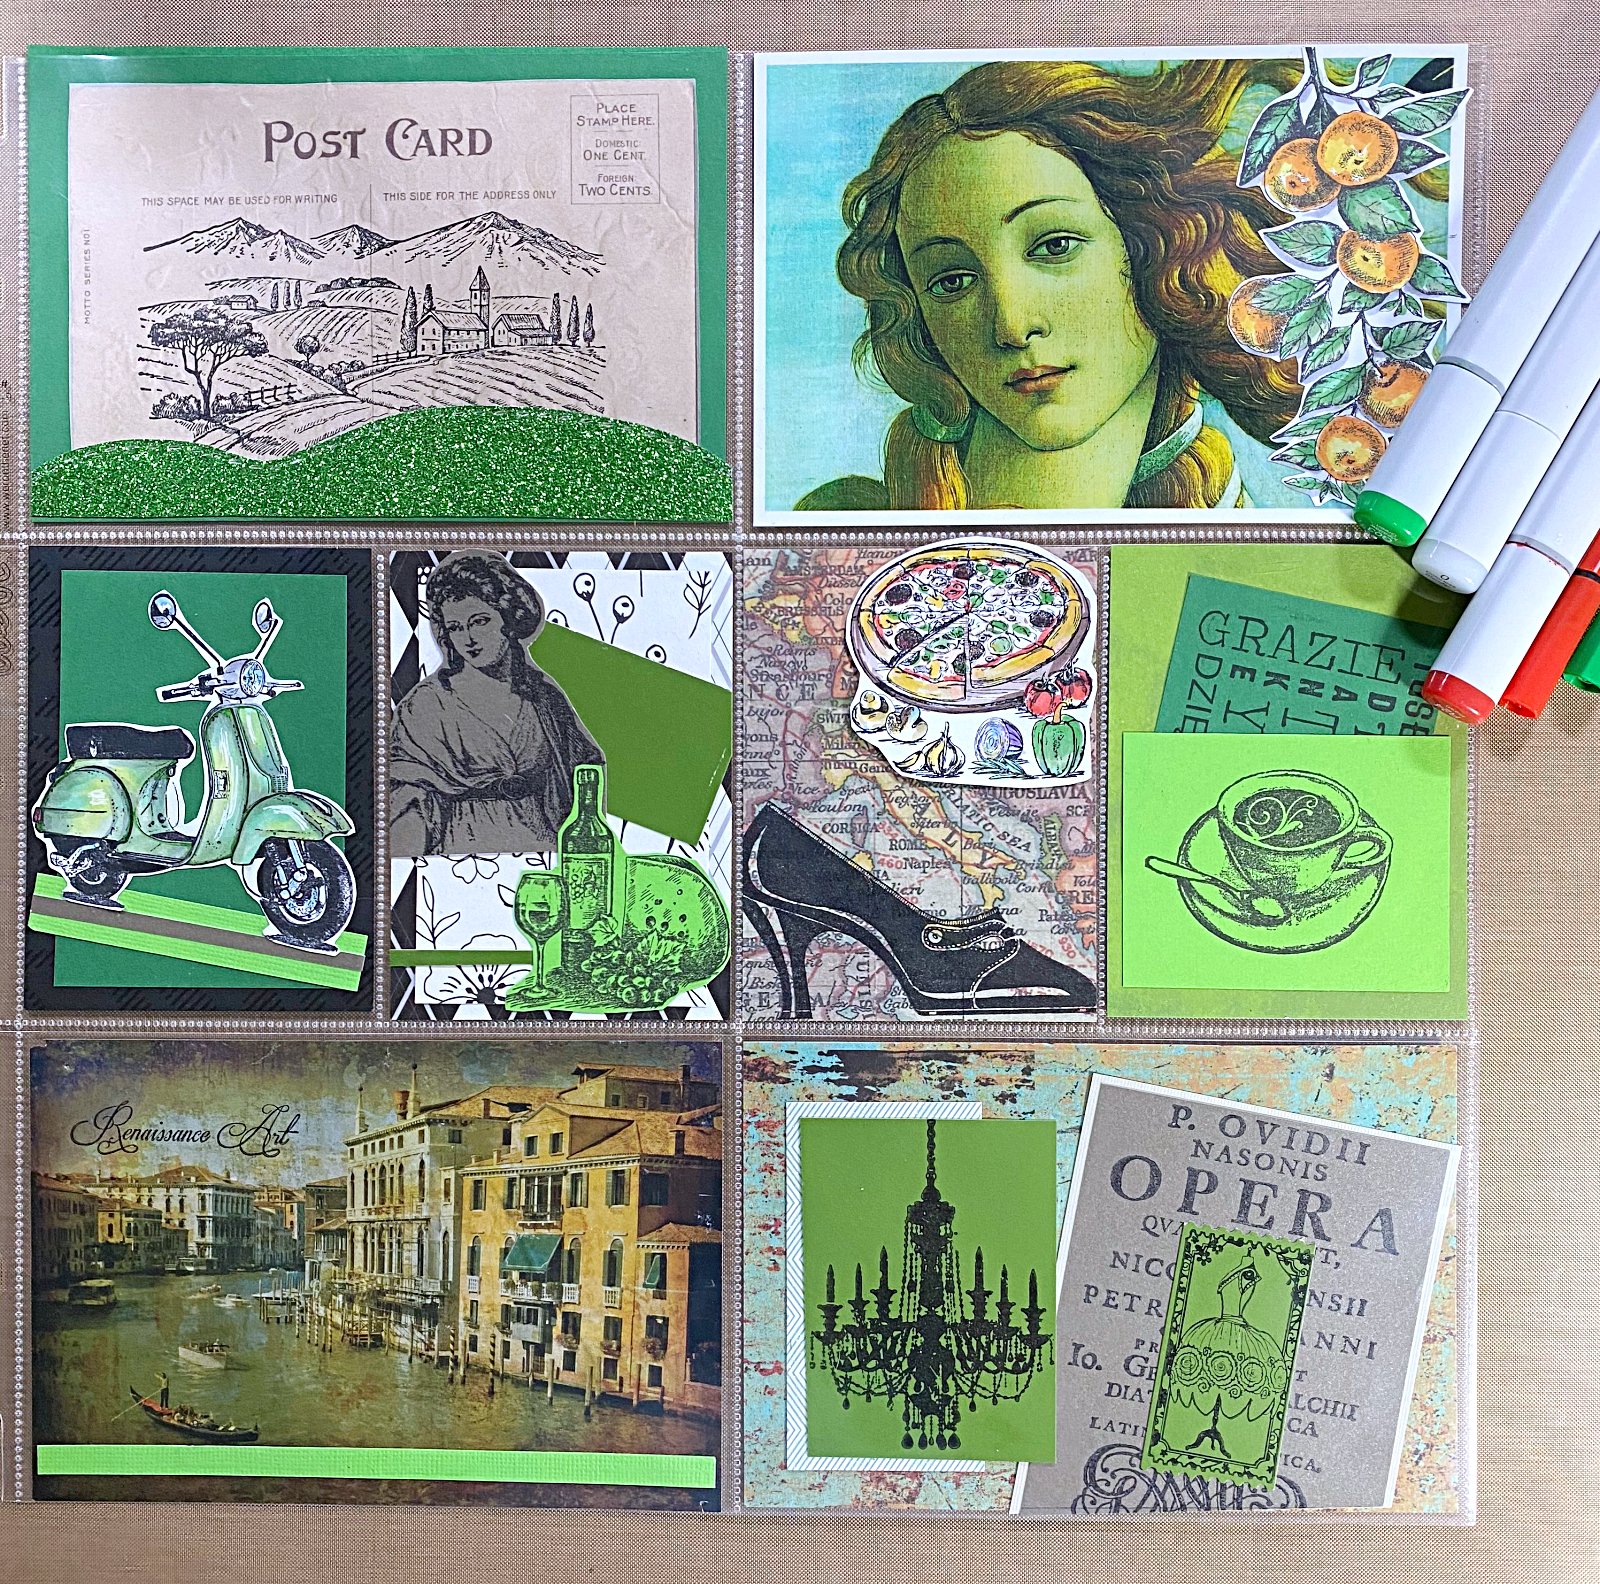
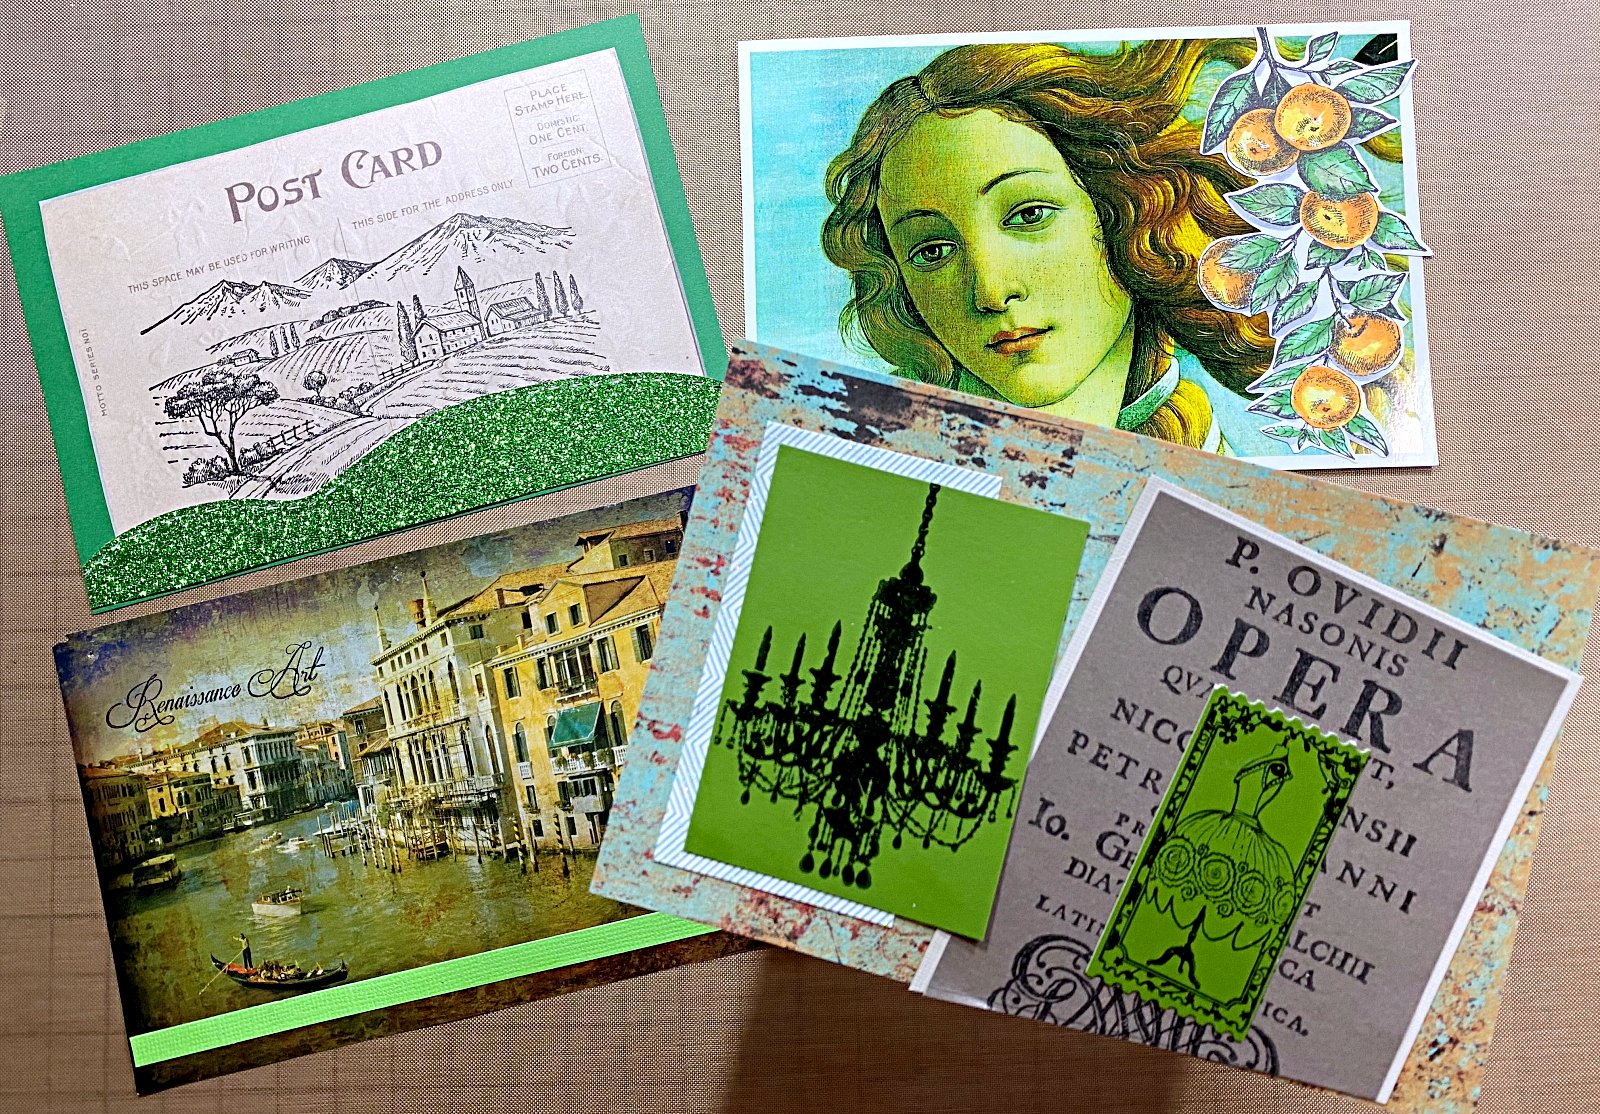
For this layout I made 4) 4x6 cards and 4) 3x4 cards, so 8 cards total. Each one features something about the country of Italy that is unique. Some of the inspiration for Italy features: Italian shoes, vineyards, Chianti, scooters, Opera, a fashion ticket, pizza, and oranges. I had printouts of Boticelli's 'Birth of Venus' and of the Venice canals, as well as a print of a map of Italy.
I couldn't help but think of certain movies that inspired some of the cards, like the opera and oranges from Godfather III. For the scooter and pizza from Eat, Pray, Love and the Casino Royale for the Venice canals. Every film in Italy features wine, so our Wine and Cheese Rubber Stamp was a must fo this. You may find other inspirations and mementos for your project. I know you will have fun creating your journey.
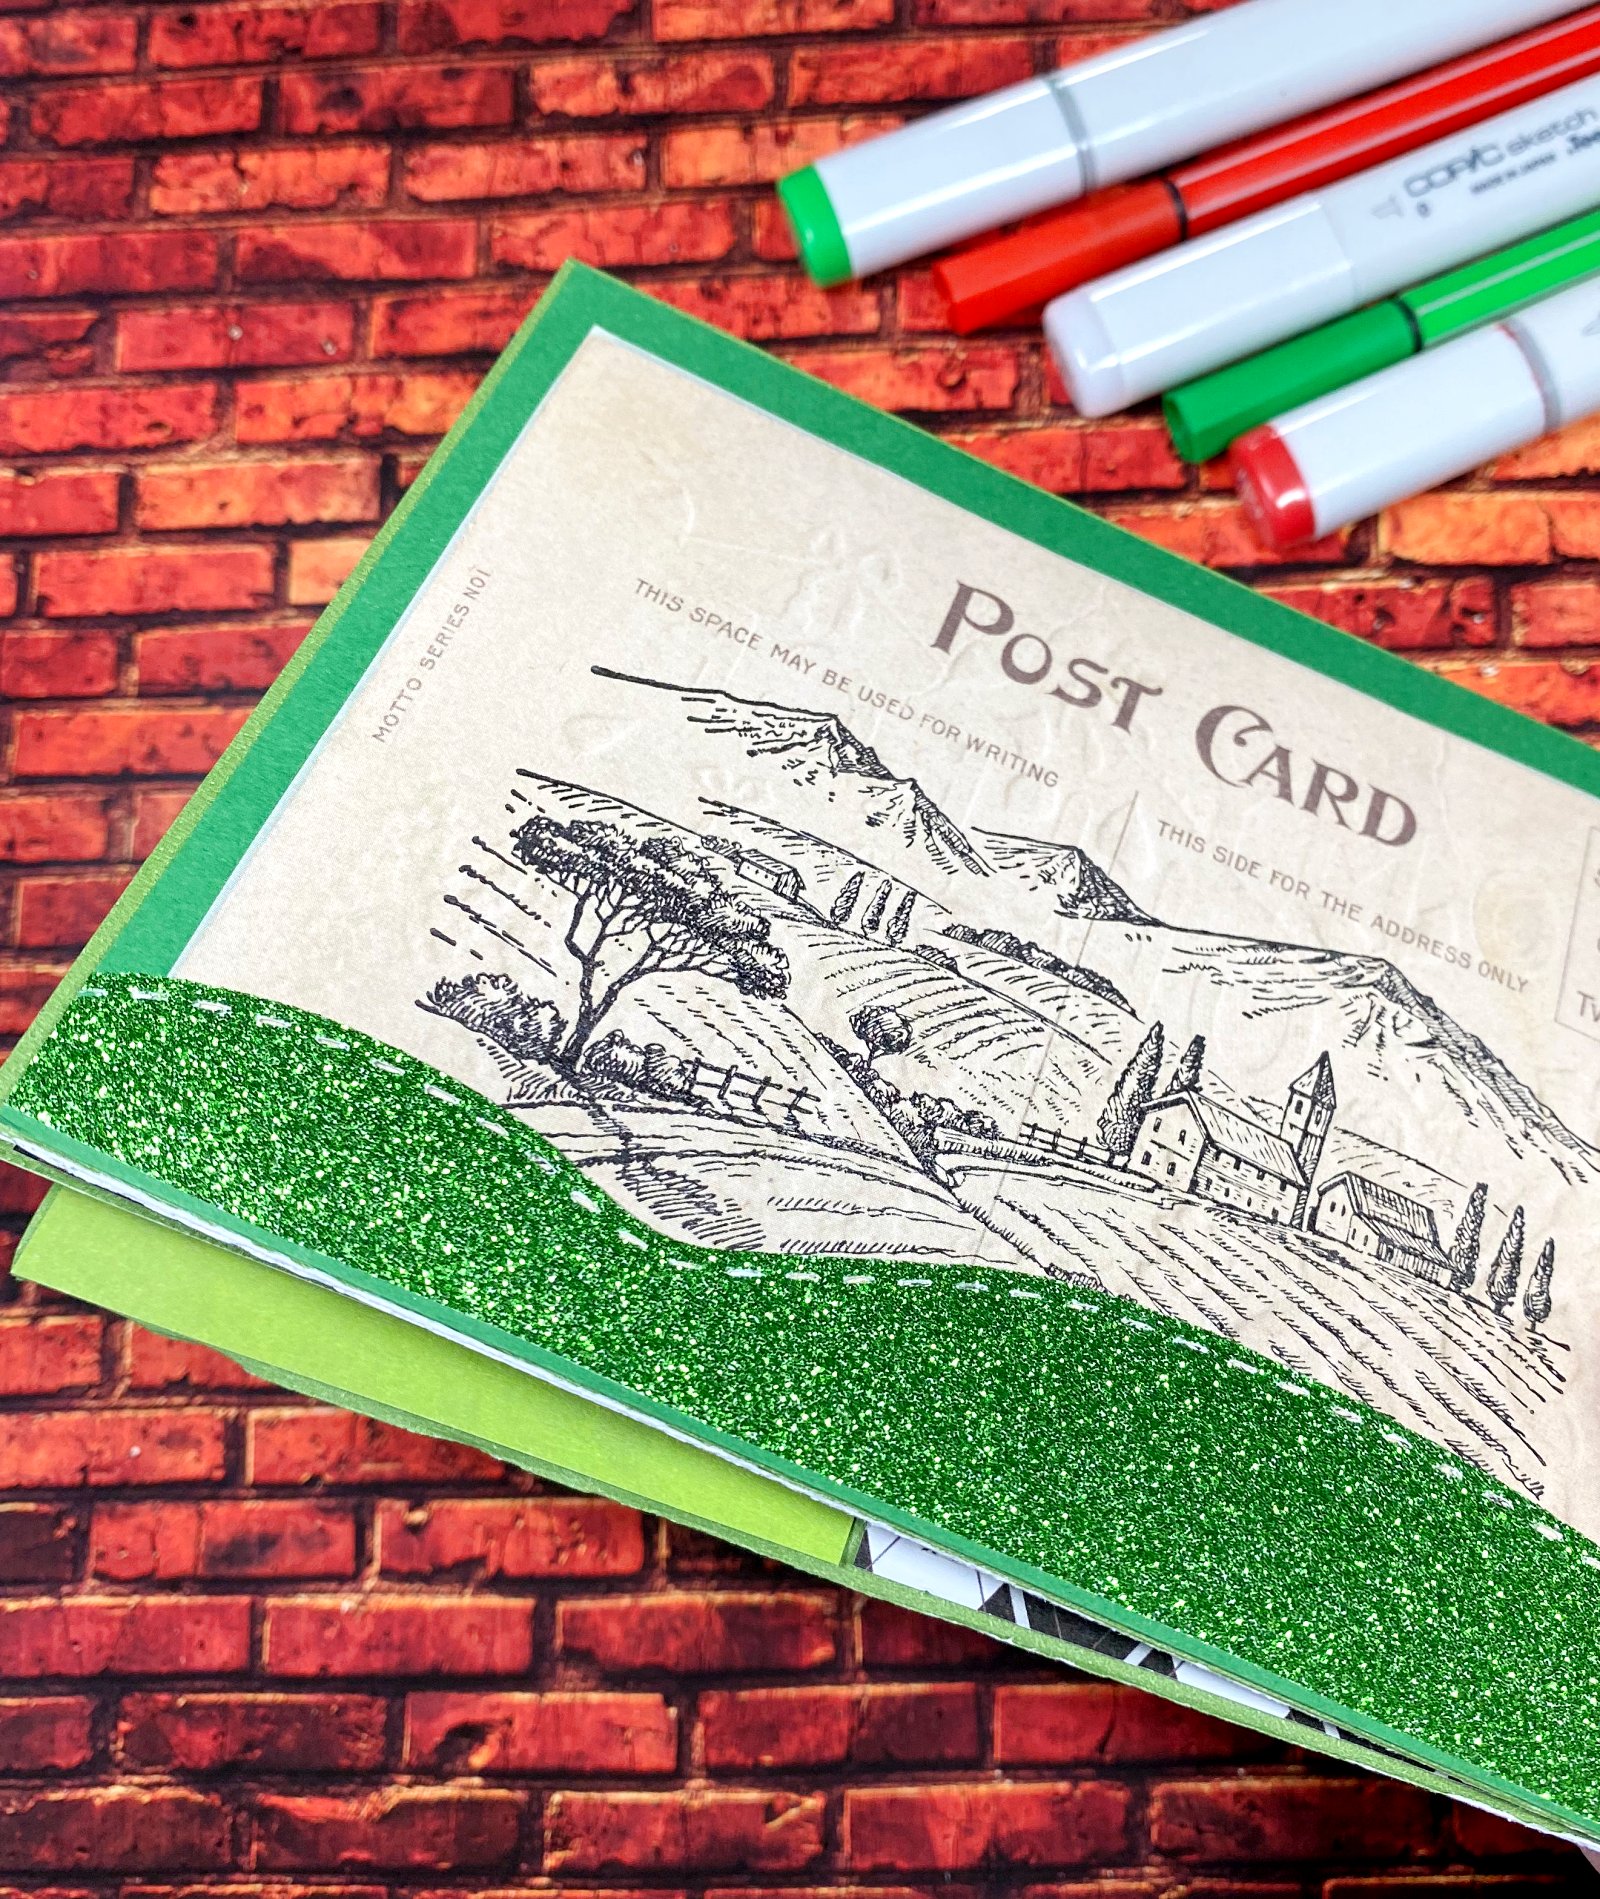
Our Rolling Hills Vineyard Rubber Stamp looks awesome on a post card themed card stock. I took our Orange Branch Rubber Stamp and cut it out, adding a bit of gray for shading. It frames Venus print and appears like her hair is flowing into the oranges (the original artwork is so beautiful, but we're journaling here, lol).
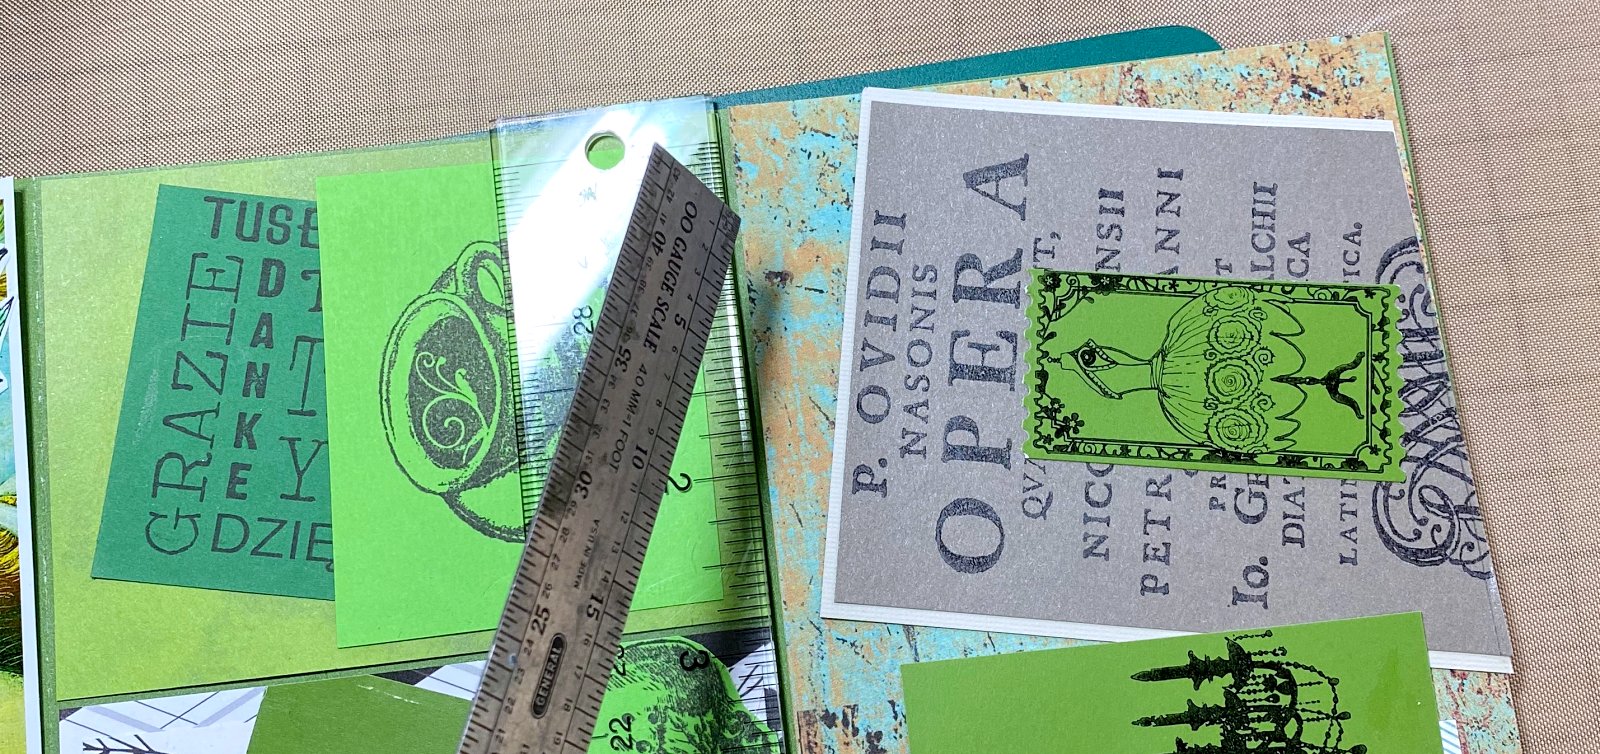
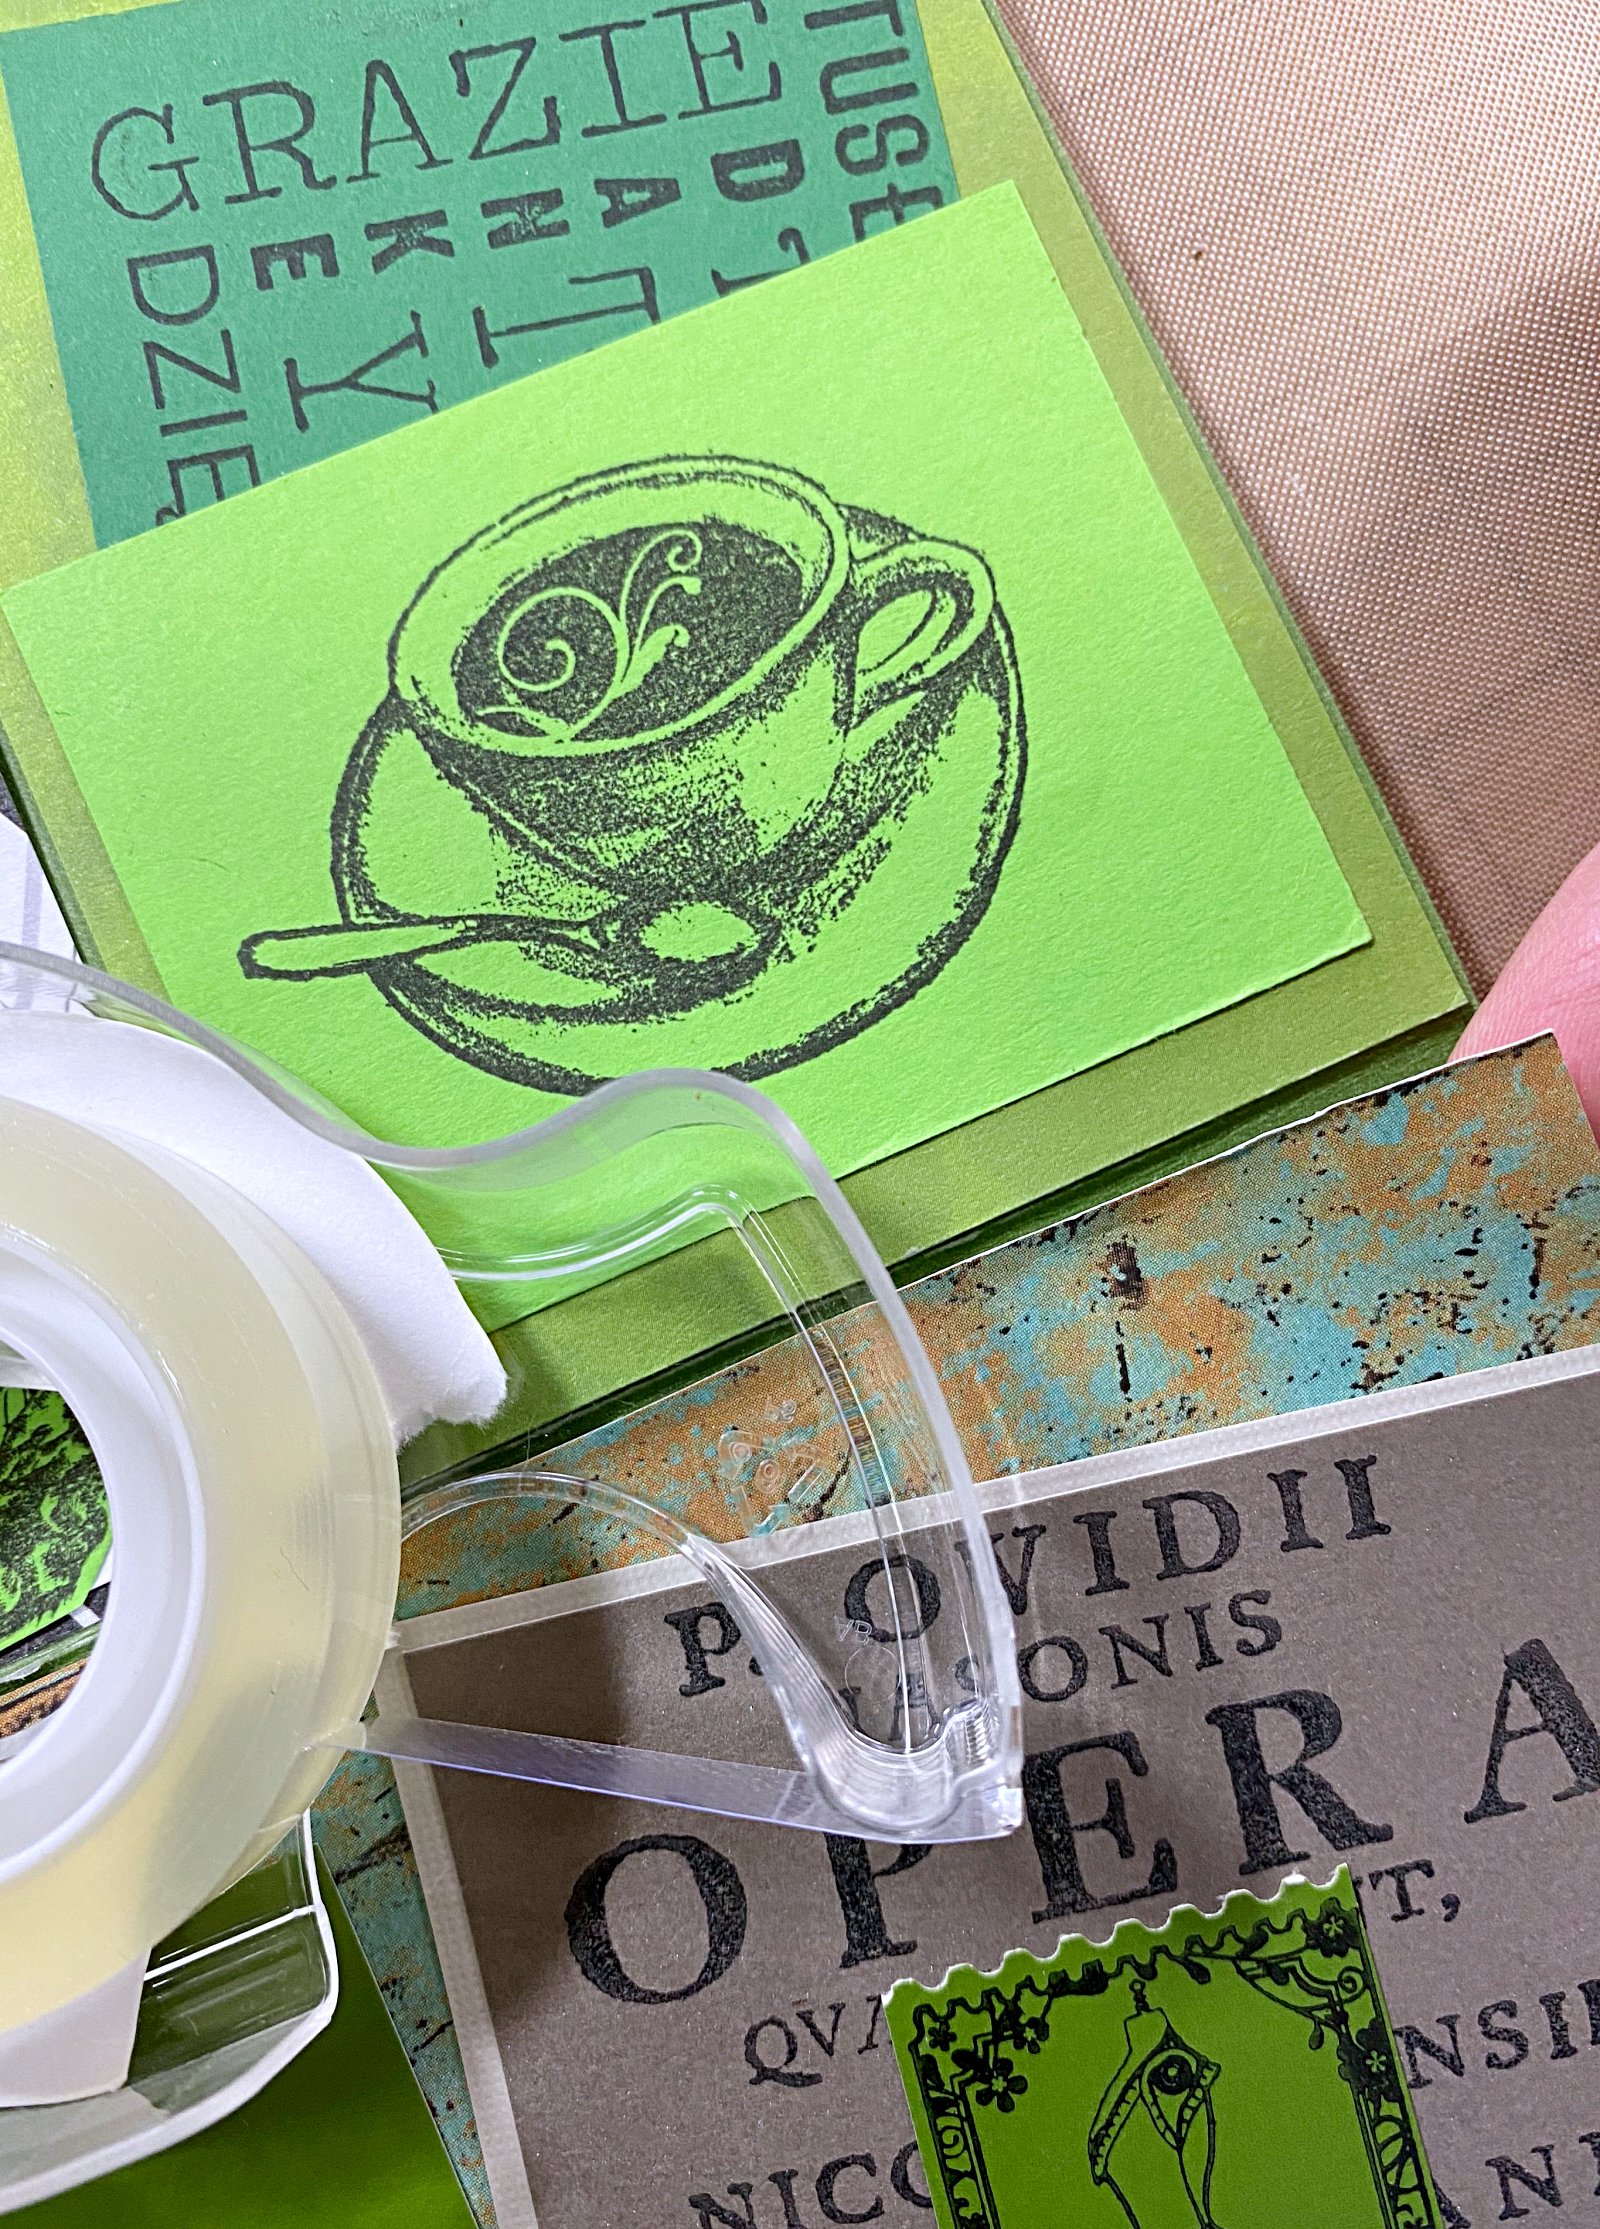
The Opera Playbill Rubber Stamp is a large stamp measuring about 3 in x 4 in, so I had to trim it to fit it onto the 4x6 card. I added our Chandelier Silhouette Rubber Stamp and a ticket from Fashion Tickets Rubber Stamp Set to complete the opera theme.
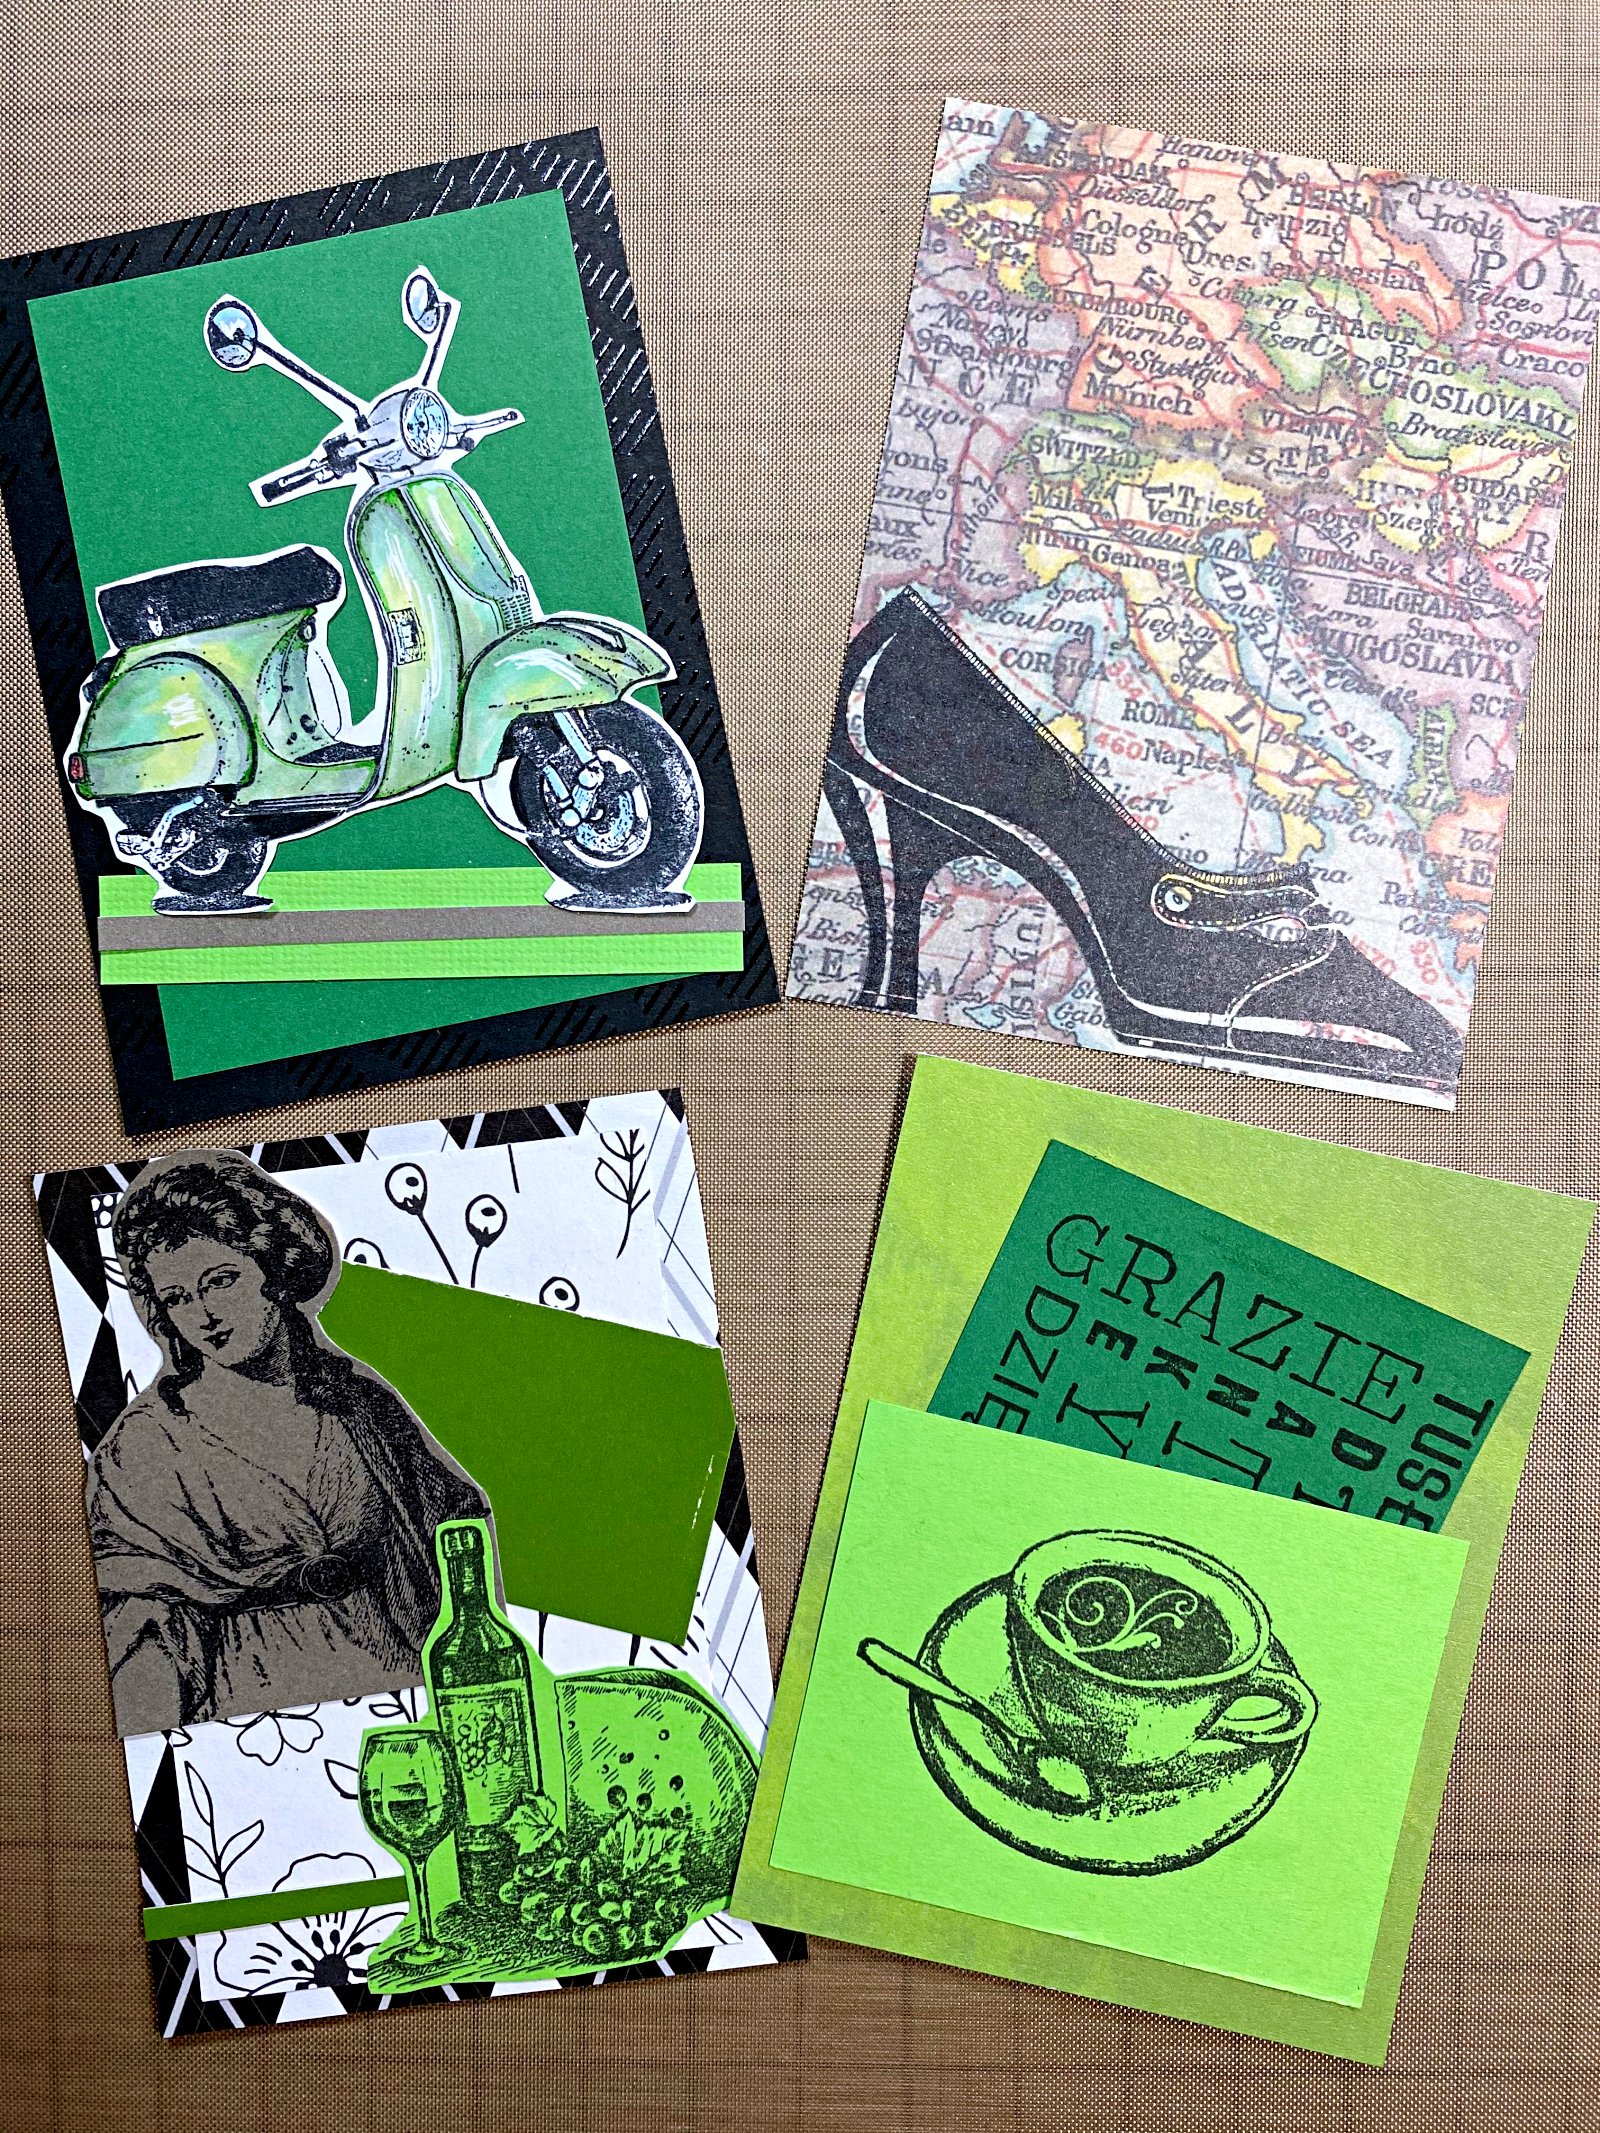
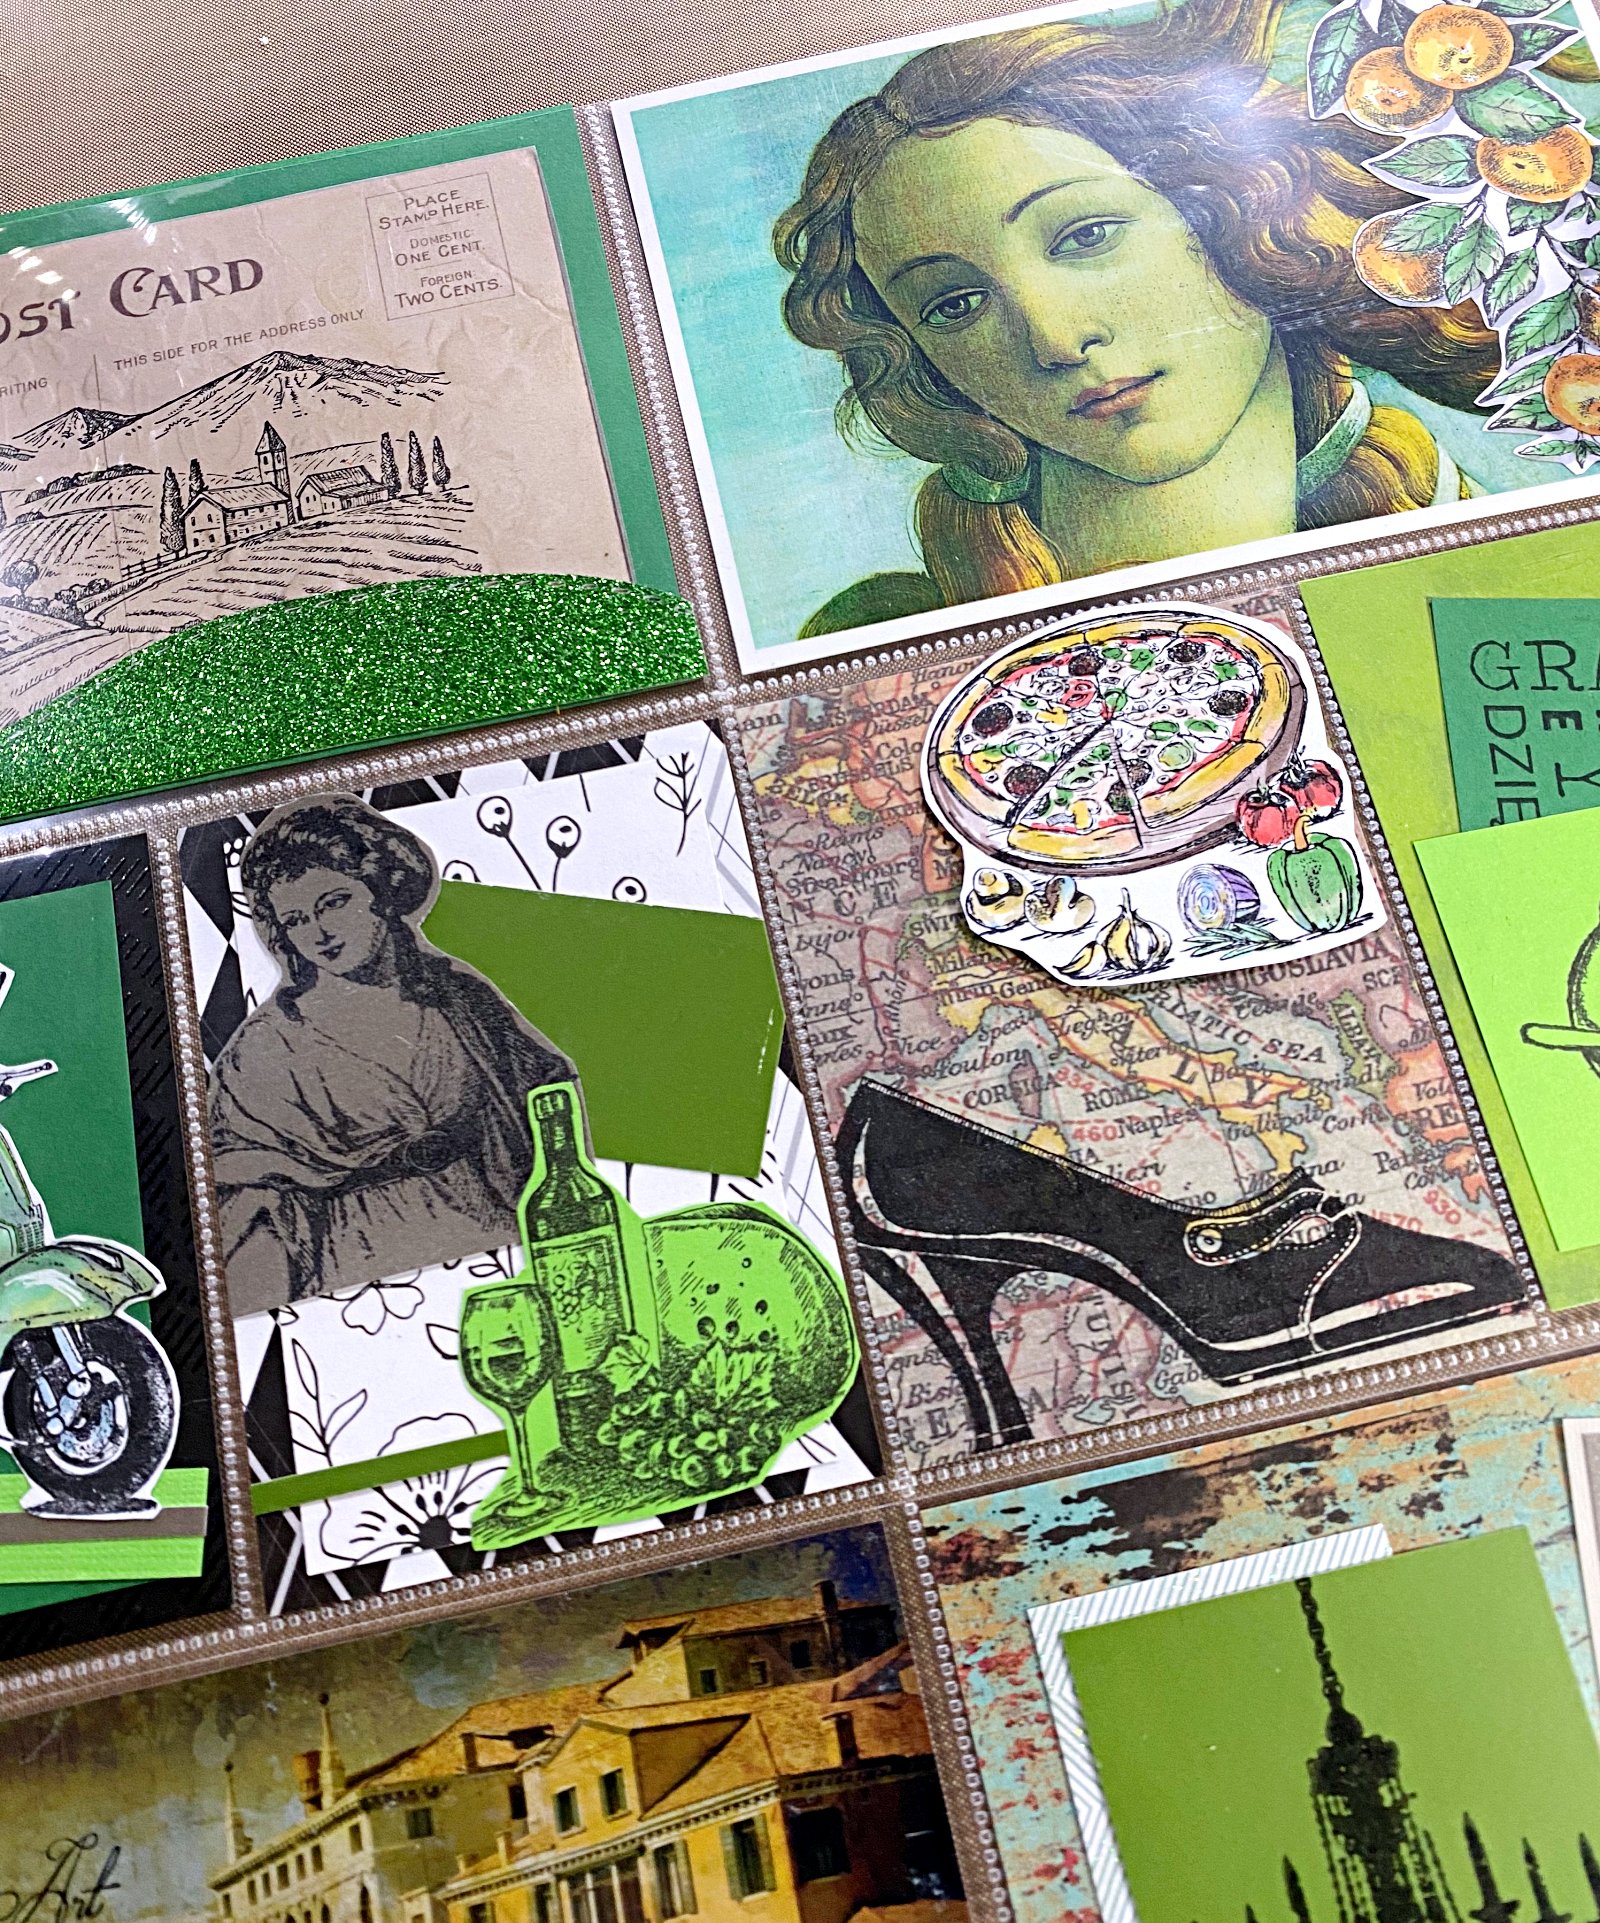
The country of Italy's shape is nicknamed 'lo stivale' which means 'the boot' because of its shape. I decided to use our Fashion Pump Rubber Stamp onto the map to represent the shape reference and a nod to the wonderful Italian shoe makers. The stamp measures about 3 inches wide and fit perfectly onto the 3x4 card. Also, its nice solid design looks good in black ink on the map paper.
I was also able to use a portion of International Thank You Rubber Stamp which shows the word, 'Grazie' next to our Flourish Latte Rubber Stamp.
Our Renaissance Girl Rubber Stamp looks good with this layout. I also used the words from this stamp onto the Venice canals print.
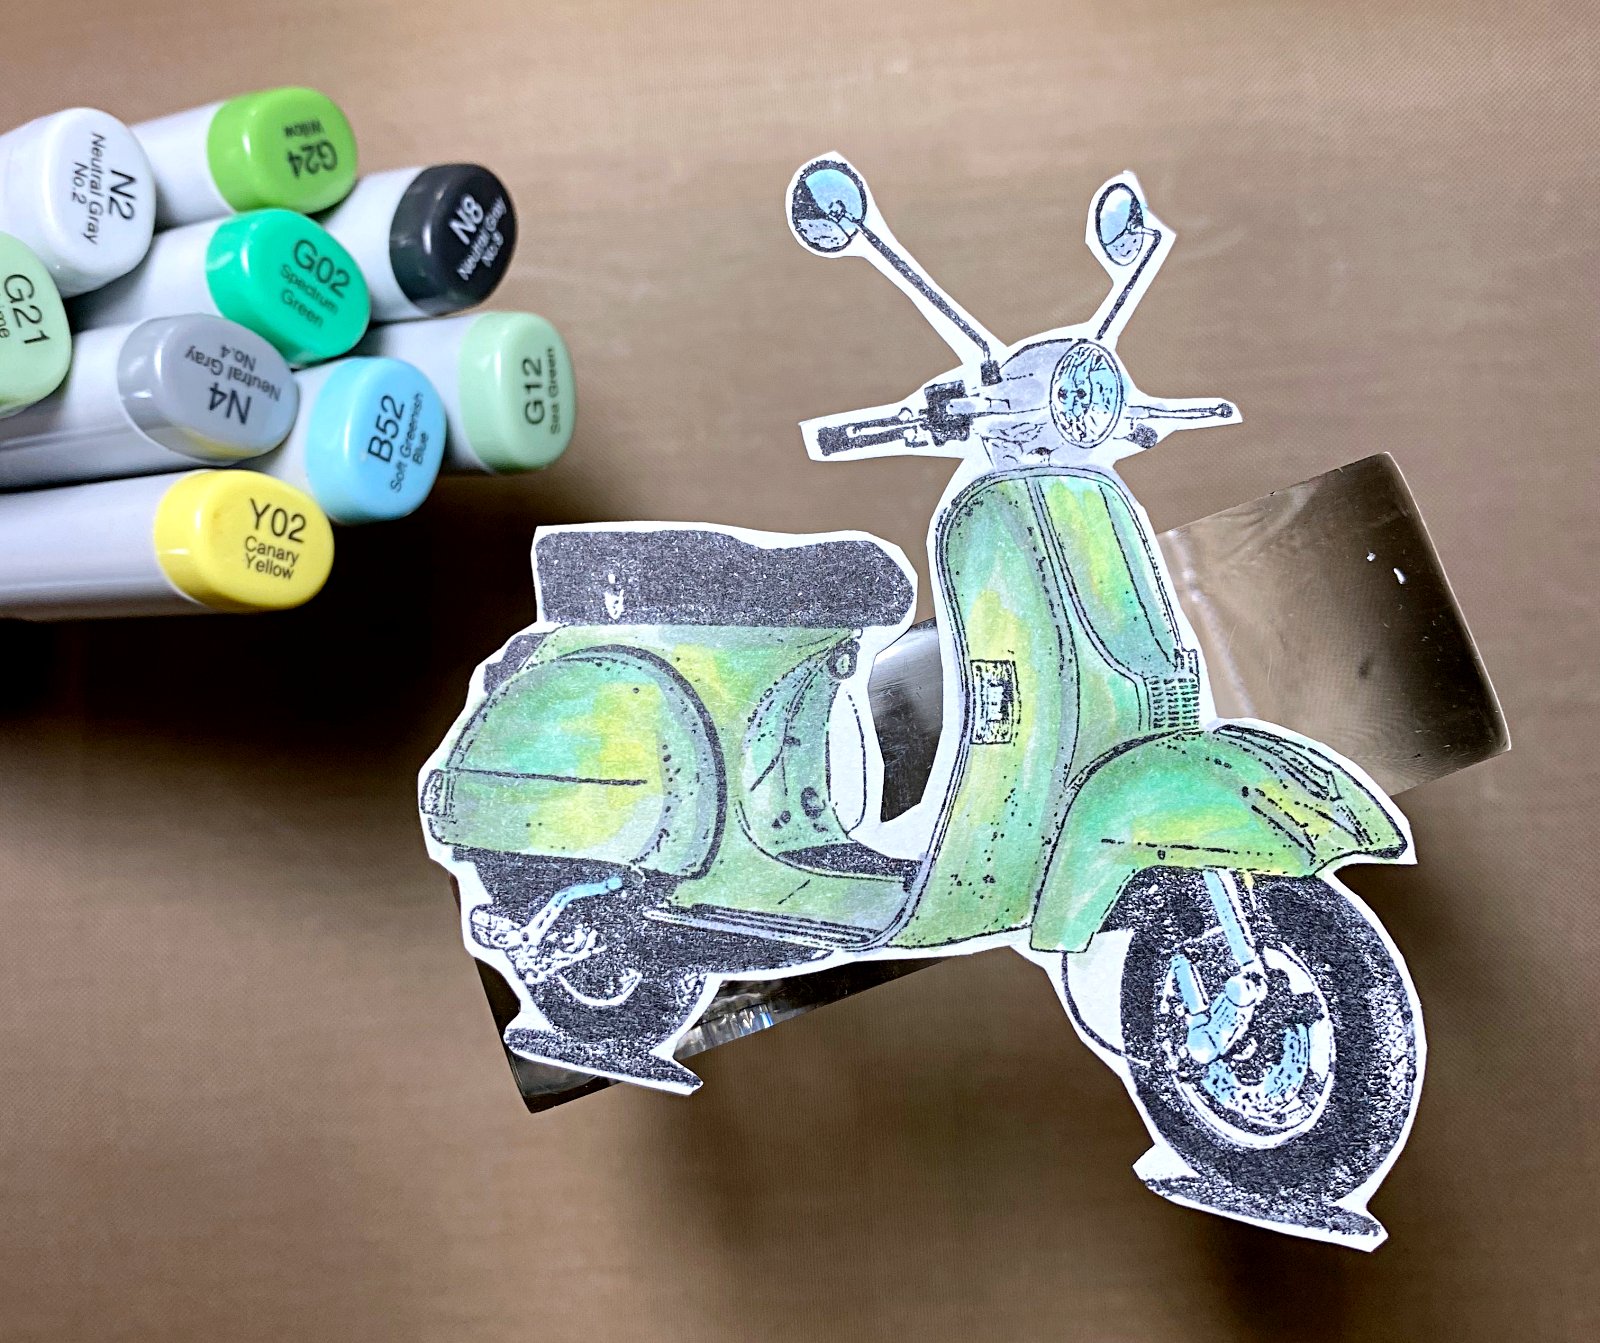
Our Scooter Rubber Stamp goes well with any European themed project or card. I used Copic Markers to color it in making it a classic mint green color to go with the overall green theme.

To keep most of the cards thin, I used Elmers Extreme Glue Stick to place the cutout designs onto each card. I used paper scraps like the green and gray strips from leftover cuts to create a type of stylized roadway for the scooter.
If you decide to make this project onto a 12x12 card stock, you will have to trim all of your cards so they are a tiny less than 3x4 and 4x6 in size. Lay all of the cards onto the 12x12. Add a swatch of double stick tape to the back of each.
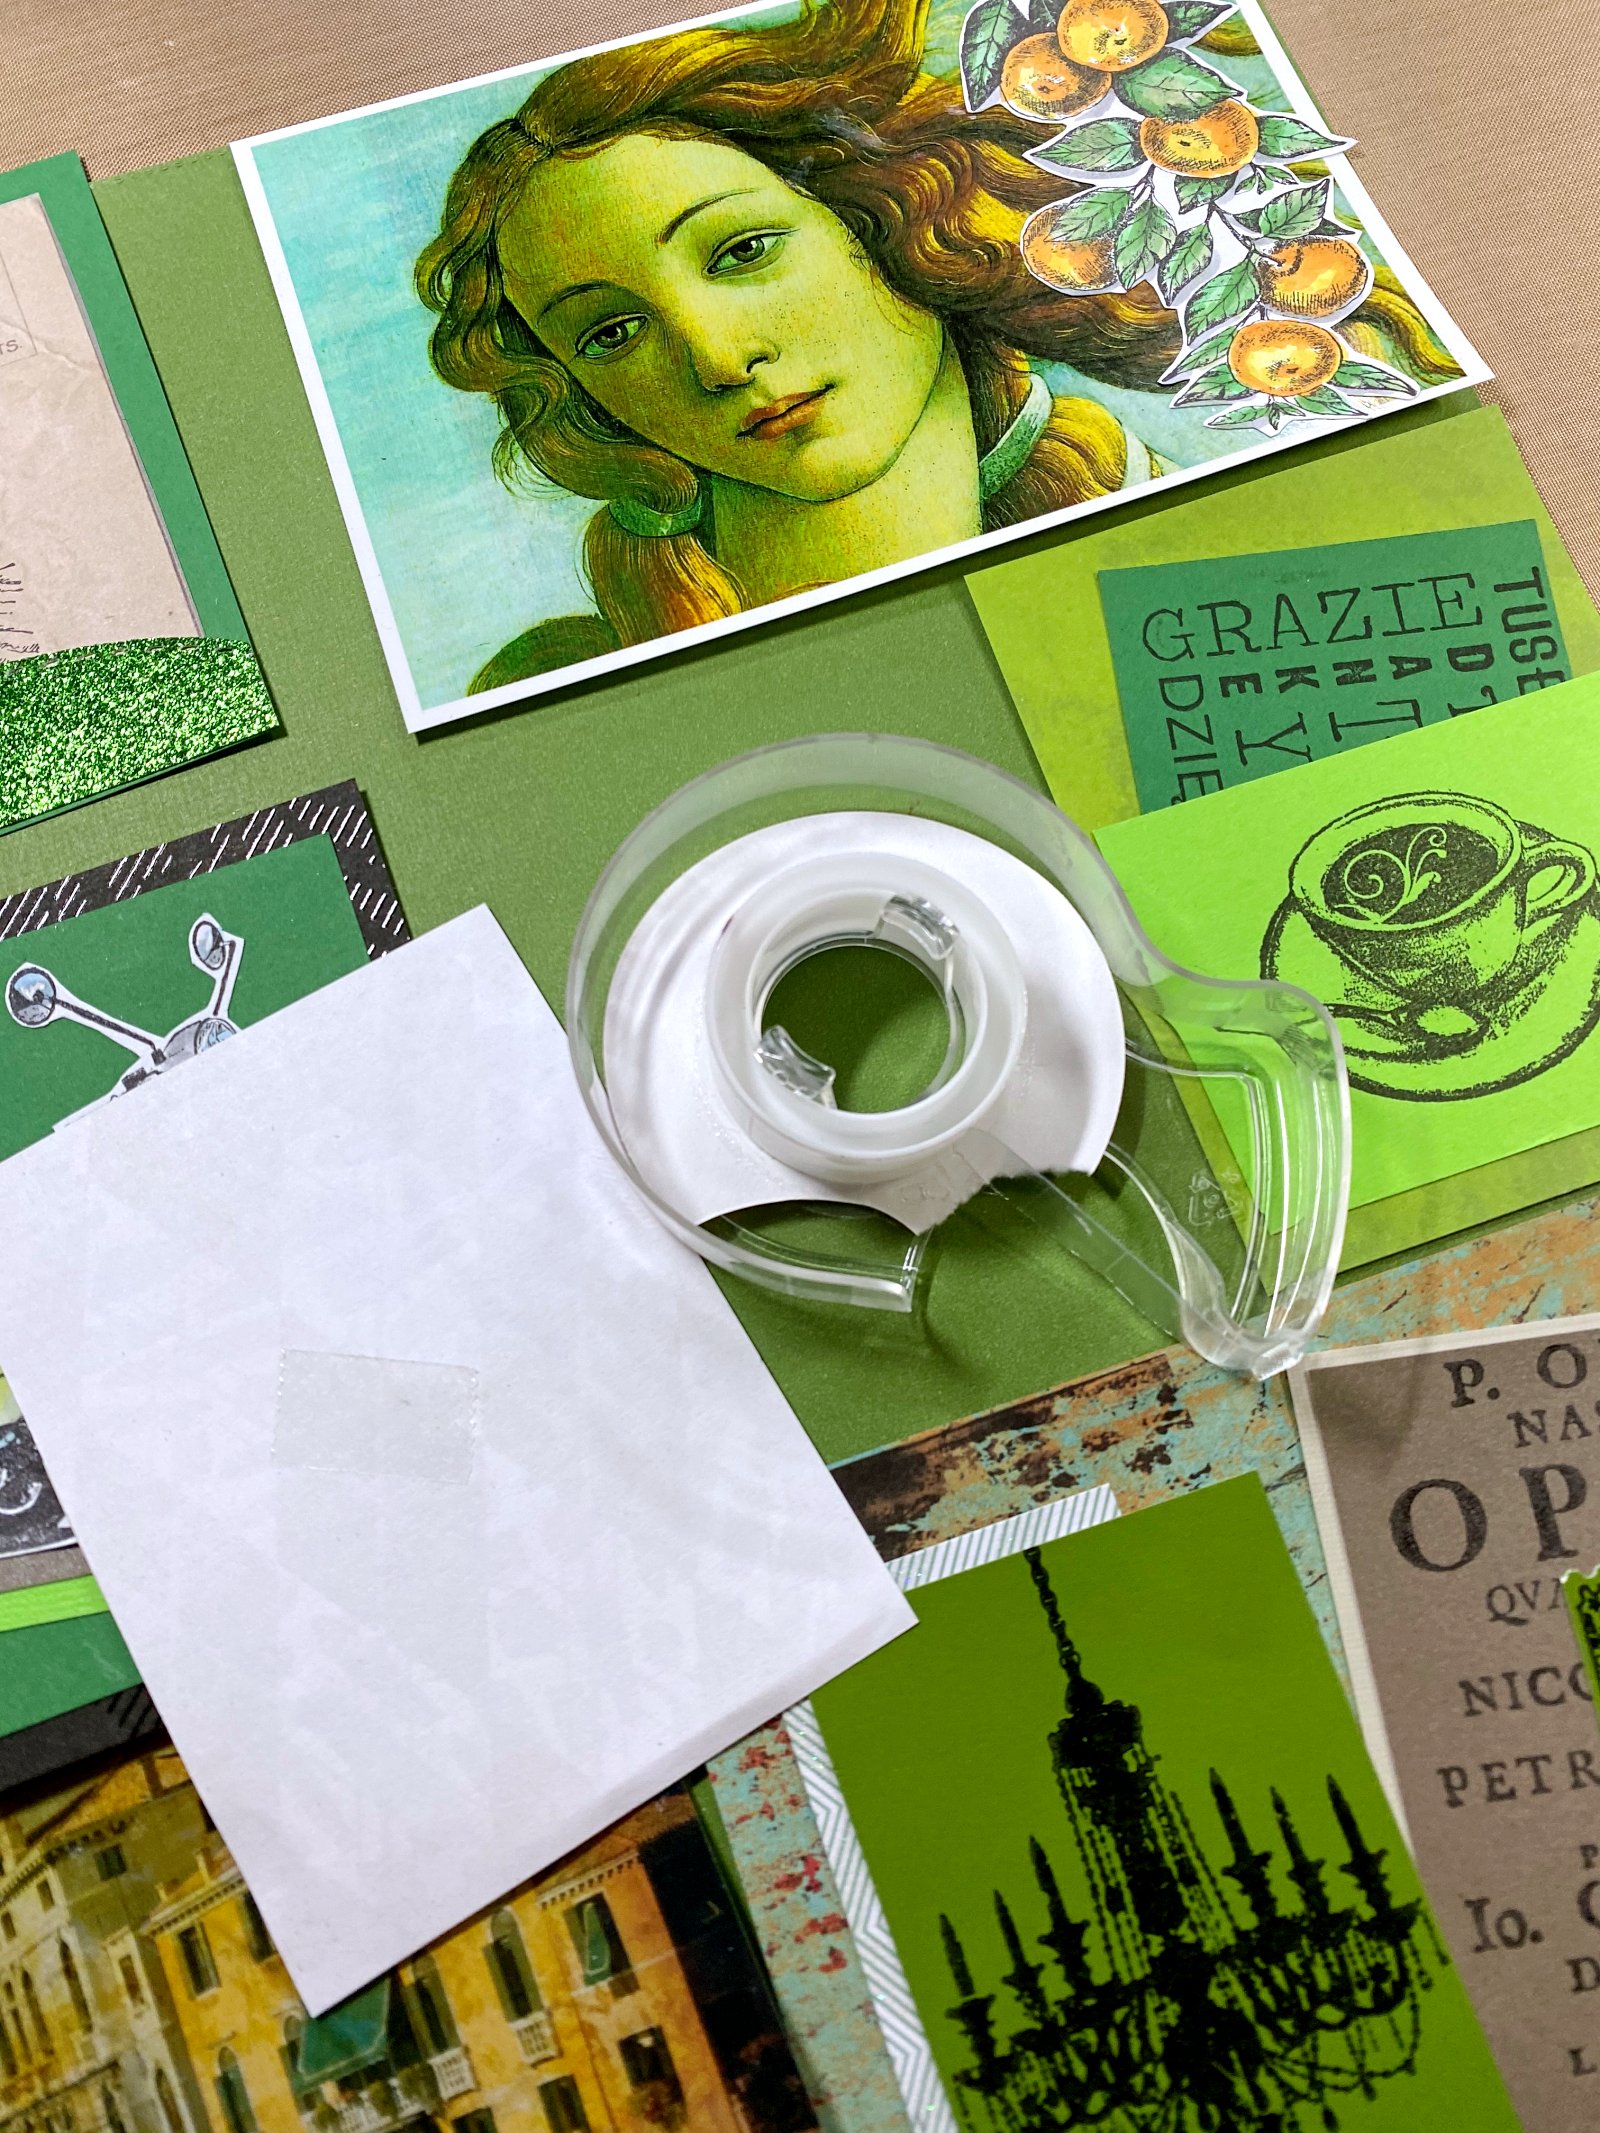
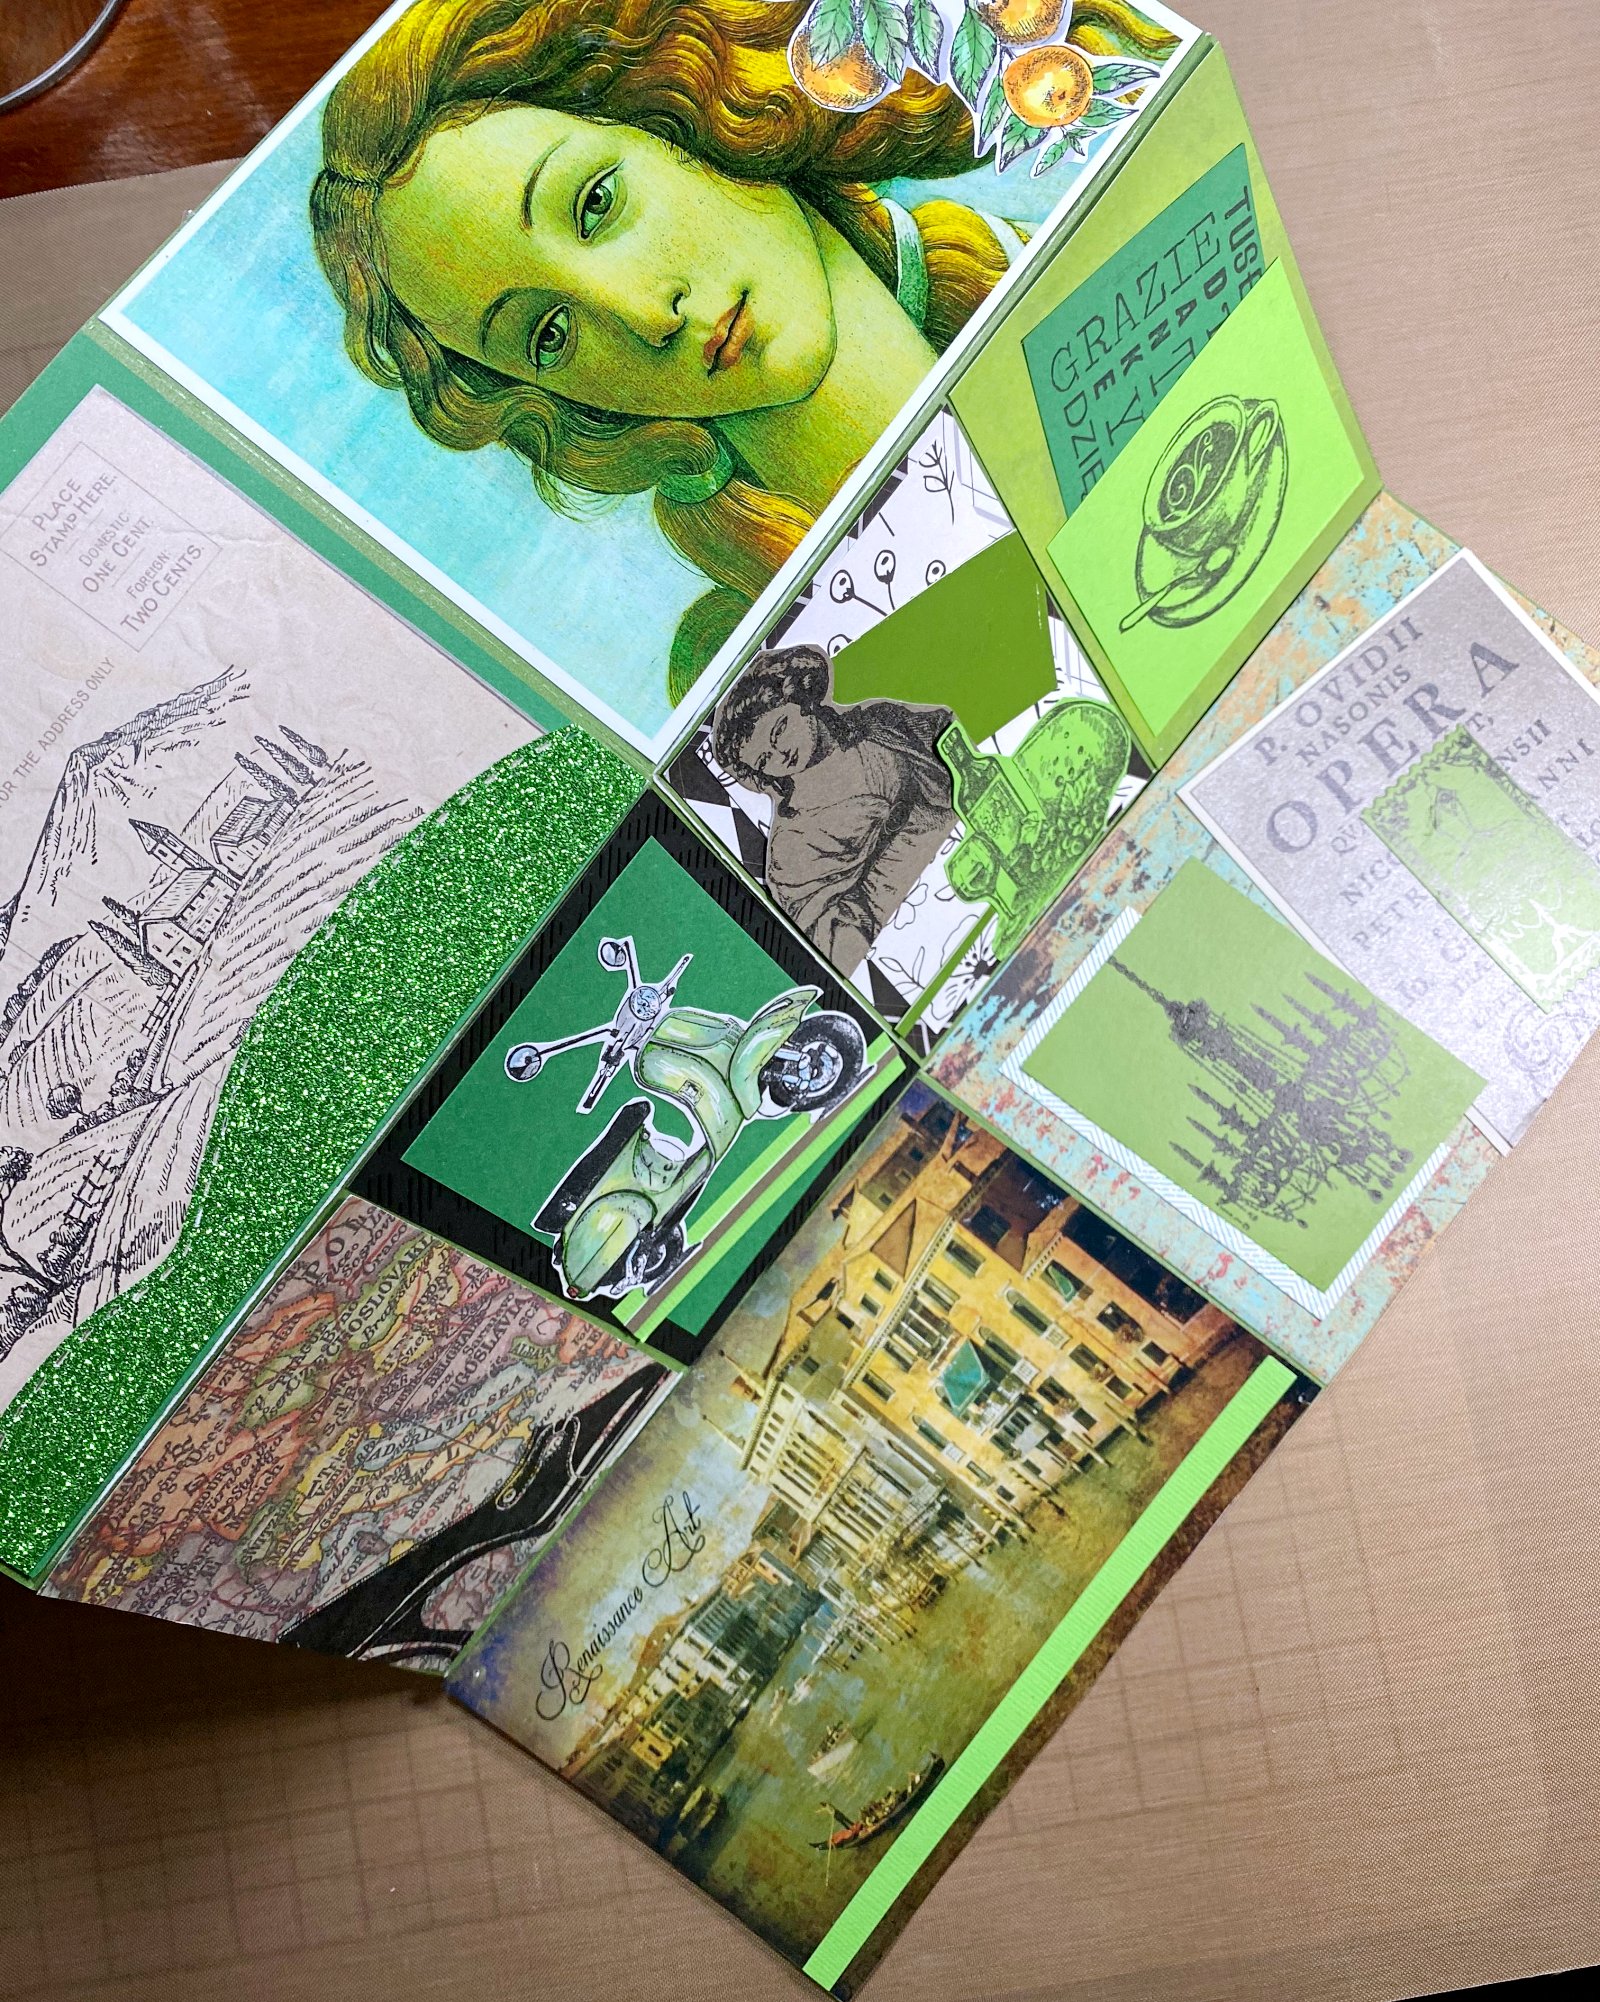
Furthermore, if you want to make the entire project foldable, add score lines: 1 vertically at 6 inches and 2 horizontally at the 4 inch and 8 inch marks.
Test fold your project and once you are happy with how it folds, finish adding double stick tape to all 4 corners of each card.
Folding the project is optional and only if you want to store it this way or place it in an envelope to mail. This is a great project to exchange with a crafting friend. Decide on a color and/or theme together. Call it a 'Story Scrapbook Page' it works whether you're telling a story or creating one!